10 Master Shower Ideas That Feel Elevated and Easy to Live With
Most shower designs fail because they look great in photos but feel annoying in daily use. That’s usually where things go wrong—too much focus on aesthetics and not enough on comfort, cleaning, or flow. A master shower should feel effortless, not like a project you have to manage every morning.
I’ve tested enough layouts (and made a few mistakes along the way) to know what actually works long-term. Some ideas feel impressive for a week, then slowly become inconvenient. Others seem simple at first but end up being the ones you appreciate every single day.
So let’s go through the kind of master shower ideas that actually hold up—visually, practically, and mentally.
1. Curbless Walk-In Shower
Stepping over a shower curb every day sounds small, but it becomes annoying fast, especially if the height isn’t right. Water splashes, awkward entry, and cleaning that edge constantly—it adds up. A curbless walk-in removes that friction completely and makes the space feel bigger instantly.
I tried this once in a smaller bathroom, and it changed the whole vibe—it felt like the room doubled in size. Plus, it just flows better visually without that break in the floor.
Why This Works
A continuous floor creates visual openness and reduces tripping hazards. It also makes cleaning easier because there’s no edge collecting grime.
From a design standpoint, it feels more modern and spa-like without trying too hard.
How to Do It
- Slightly slope the floor toward the drain
- Use large-format tiles to minimize grout lines
- Install a linear drain along one side
- Waterproof the entire area properly
- Keep shower and bathroom flooring consistent
Style & Design Tips
Go for neutral stone-look tiles to keep things timeless. Avoid overly glossy finishes—they look good but can get slippery.
A matte texture gives better grip and feels more premium underfoot.
Pro Tip or Budget Hack
If full curbless feels expensive, create a very low-profile threshold instead. It gives a similar look without major structural changes.
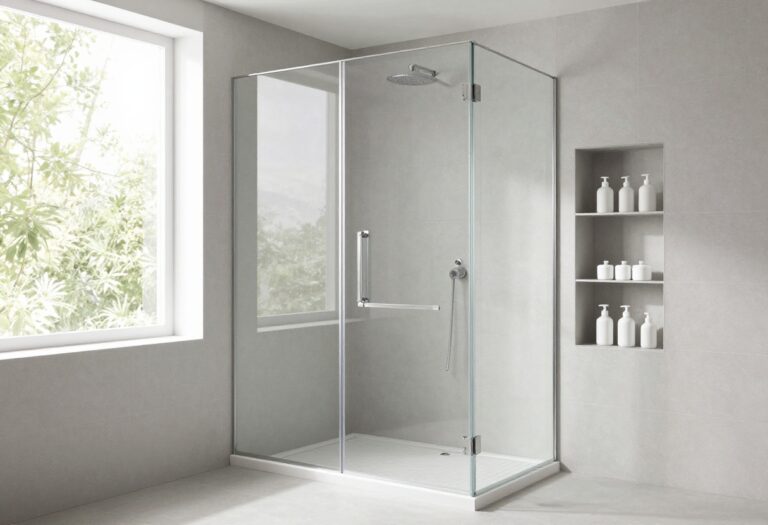
2. Frameless Glass Enclosure
Heavy frames and bulky doors can make a shower feel boxed in, even if the space is decent. Frameless glass keeps everything open and clean without visual clutter.
I used to think it was just for luxury homes, but honestly, it works even better in medium-sized bathrooms.
Why This Works
Glass allows light to pass through, making the entire bathroom feel larger. Without frames, the lines stay minimal and modern.
It also shows off your tile work instead of hiding it.
How to Do It
- Choose thick tempered glass for durability
- Use minimal hardware in brushed or matte finishes
- Keep edges clean with proper sealing
- Install a slight tilt for water runoff
- Add a door or keep it open depending on layout
Style & Design Tips
Stick to black or brushed brass hardware for a modern touch. Chrome works too, but it can feel a bit standard.
Avoid overdecorating—let the simplicity do the work.
Pro Tip or Budget Hack
Use a single fixed glass panel instead of a full enclosure. It cuts cost while still giving that open, high-end look.
3. Built-In Shower Niche
Bottles on the floor or hanging racks ruin the clean look fast. A built-in niche solves storage without adding clutter.
Once you have one, you won’t go back—it just feels organized without trying.
Why This Works
It integrates storage directly into the wall, keeping everything within reach. No extra accessories needed.
It also maintains a streamlined, intentional design.
How to Do It
- Plan niche placement before tiling
- Position it at chest height for easy access
- Use waterproof backing and sealing
- Match or contrast tiles inside the niche
- Consider multiple niches for shared showers
Style & Design Tips
Use accent tiles inside the niche to make it stand out subtly. Avoid overly busy patterns—they can feel chaotic in a small space.
Keep edges sharp and clean for a polished finish.
Pro Tip or Budget Hack
Add LED strip lighting inside the niche for a soft glow. It looks expensive but is surprisingly affordable.
4. Rainfall Showerhead with Handheld Combo
A single showerhead rarely meets all needs, especially when you want both comfort and practicality. A rainfall head feels relaxing, but a handheld is necessary for actual usability.
I learned this the hard way—rainfall alone sounds dreamy until you need to rinse quickly.
Why This Works
The combo gives flexibility without compromising experience. You get a spa feel and everyday functionality.
It also works well for cleaning the shower itself.
How to Do It
- Install rainfall head directly overhead
- Add handheld on a slide bar
- Use a diverter valve to switch between them
- Ensure proper water pressure support
- Position controls within easy reach
Style & Design Tips
Match finishes across all fixtures for a cohesive look. Matte black or brushed nickel tends to age better than shiny finishes.
Avoid oversized heads in small showers—they overwhelm the space.
Pro Tip or Budget Hack
Look for combo sets instead of buying separately. You’ll save money and ensure everything matches.
5. Large Format Tiles
Small tiles mean more grout, and more grout means more cleaning. Large tiles simplify everything while making the shower look more seamless.
I switched once, and honestly, cleaning became way less annoying.
Why This Works
Fewer grout lines create a cleaner look and reduce maintenance. It also visually expands the space.
Large tiles feel more high-end without requiring expensive materials.
How to Do It
- Choose tiles at least 12×24 inches or larger
- Use thin grout lines for a sleek finish
- Ensure proper leveling during installation
- Use high-quality adhesive for durability
- Plan cuts carefully for symmetry
Style & Design Tips
Stick with soft neutral tones like beige, gray, or off-white. They stay relevant longer and don’t feel dated.
Avoid overly bold patterns unless you’re fully committed.
Pro Tip or Budget Hack
Porcelain tiles that mimic natural stone give the same look at a fraction of the cost.
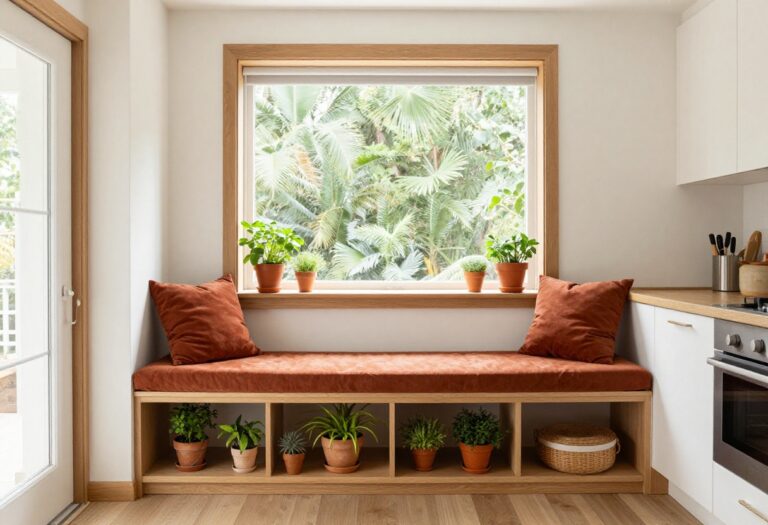
6. Bench Seating Inside Shower
Standing the entire time works, but having the option to sit changes everything. A built-in bench adds comfort without sacrificing style.
It’s especially useful when you just want a slower, relaxed shower.
Why This Works
It provides functionality for shaving, relaxing, or accessibility. It also adds a structured design element.
The space feels more intentional and complete.
How to Do It
- Build a waterproof framed bench
- Slope slightly for water drainage
- Cover with matching or accent tile
- Position away from direct water flow
- Ensure strong structural support
Style & Design Tips
Use contrasting tile on the bench surface to highlight it subtly. Keep edges clean and proportions balanced.
Avoid making it too bulky—it should feel integrated, not added.
Pro Tip or Budget Hack
A floating bench creates a lighter look and uses less material.
7. Statement Shower Wall
A fully neutral shower can sometimes feel flat. One statement wall adds depth without overwhelming the space.
I’ve seen this transform an otherwise basic shower into something memorable.
Why This Works
It creates a focal point while keeping the rest of the design simple. It also adds personality without clutter.
Balance is key here.
How to Do It
- Choose one wall as the feature
- Use textured or patterned tile
- Keep surrounding walls neutral
- Align patterns carefully
- Highlight with lighting if possible
Style & Design Tips
Go for subtle contrast instead of loud patterns. Too much detail can feel busy in a confined space.
Stick to one statement—don’t compete with other elements.
Pro Tip or Budget Hack
Use peel-and-stick waterproof tiles for a temporary upgrade if you’re on a budget.
8. Recessed Lighting Above Shower
Poor lighting can ruin even the best design. Overhead recessed lighting makes the shower feel brighter and more usable.
I didn’t think lighting mattered that much—until I fixed it.
Why This Works
It provides even illumination without shadows. It also enhances tile textures and finishes.
A well-lit shower feels cleaner and more inviting.
How to Do It
- Install waterproof recessed fixtures
- Position directly above the shower area
- Use warm white light for a cozy feel
- Ensure proper sealing for safety
- Connect to main bathroom lighting
Style & Design Tips
Avoid harsh cool lighting—it feels clinical. Soft warm tones work better for everyday use.
Keep fixtures minimal and flush.
Pro Tip or Budget Hack
Use dimmable lights to switch between functional and relaxing moods.
9. Linear Drain for Clean Look
Traditional center drains break the visual flow of the floor. A linear drain keeps everything sleek and aligned.
It’s one of those small details that quietly elevates the whole design.
Why This Works
It allows for a single-direction floor slope, which works perfectly with large tiles. It also looks more modern.
The floor feels uninterrupted and clean.
How to Do It
- Place drain along one wall
- Slope floor toward that side
- Choose a finish that matches fixtures
- Ensure proper installation for drainage
- Align tiles with the drain direction
Style & Design Tips
Pick a low-profile metal finish that blends in. You don’t want the drain stealing attention.
Keep lines straight and consistent.
Pro Tip or Budget Hack
Some linear drains come with tile-in covers, making them almost invisible.
10. Neutral Color Palette with Texture
Color trends change fast, but texture holds up. A neutral palette with layered textures keeps things interesting without feeling dated.
This is one approach I always come back to.
Why This Works
Neutrals create a calm base while textures add depth. It stays timeless and adaptable.
You won’t feel the need to update it every year.
How to Do It
- Choose 2–3 core neutral tones
- Mix matte and slightly textured finishes
- Add variation through tile patterns
- Keep fixtures consistent
- Avoid too many competing colors
Style & Design Tips
Focus on contrast through texture, not color. That’s what gives the space dimension.
Stay away from overly trendy shades unless you’re okay redoing things later.
Pro Tip or Budget Hack
Use textured wall panels instead of expensive tiles to achieve a similar layered look.
Final Thoughts
A good master shower doesn’t just look nice—it works smoothly without effort. Small details like layout, storage, and materials end up making the biggest difference.
If something feels easy to use every day, that’s when you know you got it right. I’d always choose comfort and flow over flashy design, and honestly, that’s what ends up looking better anyway.