11 Half Wall Shower Ideas That Balance Openness and Privacy
Good bathroom design usually comes down to control, not size. A half wall shower works because it solves two annoying problems at once: it keeps the space feeling open while still giving the shower area enough structure to look intentional.
That balance is harder to get right than people think. Go too closed and the bathroom feels boxed in, but go too exposed and the whole setup starts feeling awkward fast.
I’ve always liked half wall showers because they feel custom without demanding a full luxury-bathroom budget. They also give you a lot more flexibility with tile, storage, glass, and layout, which is exactly why they keep showing up in smart bathroom remodels.
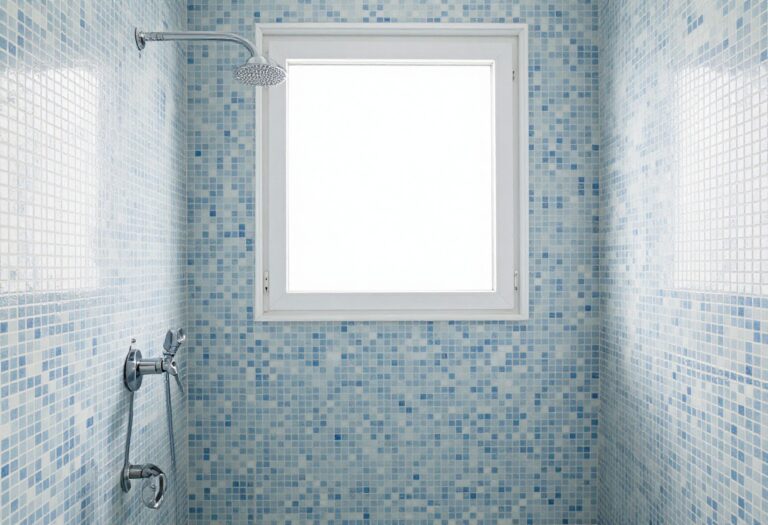
1. Classic Tile Half Wall With Clear Glass Top
A fully open shower can make a bathroom look bigger, but it also leaves everything on display and lets water wander wherever it feels like going. A classic half wall with tile on the bottom and clear glass on top fixes that without making the room feel chopped up.
This is one of the safest choices if the goal is a clean, modern bathroom that still feels practical. I like it because it looks polished without trying too hard, and it works in both small bathrooms and bigger primary suites.
The tiled lower section gives you privacy where it actually matters, while the clear glass keeps sightlines open. That combination helps the shower feel airy, which is a big deal if the bathroom already feels tight.
Why This Works
The visual weight stays low, so the room doesn’t feel blocked off by a full wall. At the same time, the glass top lets light move through the space, which keeps the layout from looking heavy or dated.
This setup also handles splash control better than a totally open shower. The half wall creates a built-in barrier, and the glass extension adds just enough height to stop the mess without closing the shower in.
How to Do It
- Build the lower wall to about chest height so it offers privacy without overpowering the room.
- Tile the wall in the same material used in the shower area to keep the design connected.
- Install a clear glass panel above the wall to maintain openness and improve water control.
- Slope the shower floor correctly toward the drain because even a beautiful shower turns annoying real quick if water escapes.
- Use minimal hardware on the glass so the whole setup stays sleek instead of busy.
Style & Design Tips
Stick with larger tile if the bathroom is small because tiny tile on a half wall can start looking visually noisy. Clear glass usually works better than frosted here since the point is to keep the room feeling open, not create another visual barrier.
Try matching the wall tile with the shower floor or niche tile for a more custom look. One mistake people make is using a random accent tile on the half wall that fights with everything else, and honestly, it shows.
Pro Tip or Budget Hack
If custom glass feels expensive, keep the design simple and avoid curves or fancy edges. Straight panels cost less, install more easily, and still give you that upscale look without the “I just burned my whole reno budget on one piece of glass” energy.
2. Half Wall Shower With Built-In Storage Niche
A shower wall can do more than divide space if you plan it right. Turning a half wall into a built-in storage zone is one of those ideas that looks smart on paper and feels even better once you stop balancing shampoo bottles like a circus act.
This works especially well in bathrooms where storage is limited or the vanity is already crowded. I’m a big fan of anything that makes a bathroom look cleaner without adding another shelf or organizer that collects dust and regret.
The half wall gives you a natural place to build a recessed niche or ledge. That means your shower essentials stay tucked in, the space feels more organized, and the design ends up looking more custom.
Why This Works
Functionally, it reduces clutter inside the shower and keeps daily-use products within reach. Visually, it makes the half wall feel purposeful instead of just decorative, which is always a win in smaller bathrooms.
It also helps maintain better flow because storage becomes part of the architecture. Instead of hanging caddies or corner baskets, you get a cleaner line and a more finished look.
How to Do It
- Decide early whether you want a recessed niche, an open cubby, or a flat ledge built into the half wall.
- Measure your most-used bottles before framing so the storage actually fits real products, not fantasy-sized ones.
- Waterproof the niche carefully because this is not the place for lazy shortcuts.
- Tile the inside of the niche in a coordinating or slightly contrasting tile to define the feature.
- Keep the storage on the shower-facing side so the outer bathroom wall stays visually neat.
Style & Design Tips
Choose storage that feels intentional, not oversized. A niche that is too tall or too wide can throw off the proportions of the wall and make the whole shower look awkward.
This is also a good place to bring in subtle contrast through tile shape, not wild color. A stacked vertical tile or small mosaic works nicely inside the niche, but I’d avoid anything too trendy unless you enjoy redoing bathrooms for fun.
Pro Tip or Budget Hack
A simple tiled ledge costs less than a fully recessed niche and still gives you useful storage. If the budget is tight, that’s the move I’d make first because it adds function without pushing labor costs higher.
3. Pony Wall Shower With Black Framed Glass
Some bathrooms need structure more than softness. A pony wall shower with black framed glass adds definition fast, which makes it a strong choice if the room feels plain, overly white, or like it forgot to develop a personality.
This style leans modern industrial, but it can also work in farmhouse or transitional spaces if the rest of the bathroom supports it. I like it when a bathroom needs contrast because black framing gives the shower a clear presence without requiring a million decorative extras.
The lower wall grounds the design, and the framed glass above it creates a bold outline. That makes the shower feel intentional and architectural, even if the rest of the room is fairly simple.
Why This Works
The black lines draw the eye upward and add shape, which helps a bathroom feel more designed. Meanwhile, the half wall keeps the base solid and useful, so the shower still feels anchored instead of flimsy.
This combo also balances privacy and openness really well. You get coverage at the lower level and transparency above, but the frame adds visual separation that feels a little more private than totally clear, frameless glass.
How to Do It
- Build the pony wall with clean, straight lines because crooked framing will look even worse once black metal is added above it.
- Use a matte black framed glass panel or door system that matches your faucet and hardware finishes.
- Keep the wall tile simple so the black frame gets to be the statement.
- Check the scale of the grid pattern if using divided glass because chunky lines can overwhelm a small bathroom.
- Repeat the black finish in mirrors, lighting, or cabinet pulls so the look feels cohesive.
Style & Design Tips
This style works best when the black accents are repeated, not randomly dropped in one place. Consistency matters, or the shower starts looking like it belongs to a different bathroom entirely.
Avoid pairing black framed glass with too many competing patterns. If the floor tile is busy and the shower tile is busy and the glass is gridded, the whole room starts arguing with itself.
Pro Tip or Budget Hack
Skip true steel-style custom framing if it blows the budget. Many aluminum framed glass options give a similar look for less, and once everything is installed, most people are not crawling around the bathroom to inspect your metal pedigree.
4. Half Wall Shower With a Wide Tiled Ledge
A half wall can quietly solve one of the most annoying shower problems: having nowhere practical to set anything down. Adding a wide tiled ledge turns that wall into a functional surface for bath products, candles, folded towels, or even a little decor on the outer side.
This idea works best when the half wall has enough depth to feel useful. I’ve seen this done in a few remodeled bathrooms, and it instantly made the space feel more thoughtful instead of just builder-basic.
The shower side can hold soap and shampoo, while the bathroom-facing side can act almost like a mini shelf. That double-duty setup makes the wall pull its weight, which I always respect in a small room.
Why This Works
A ledge adds utility without eating floor space, and that matters a lot in bathrooms where every inch counts. It also softens the transition between the shower and the rest of the room because the wall feels more integrated into the layout.
The broader top surface gives the eye a place to land. That makes the design feel calmer and more substantial, especially if the rest of the bathroom includes sleek finishes and clean lines.
How to Do It
- Build the half wall thick enough to support a practical ledge, not just a skinny strip that collects water and disappointment.
- Top the wall with stone, quartz, or properly sloped tile so water doesn’t sit on the surface.
- Keep the ledge wide enough for actual use, ideally enough space for a few products without crowding.
- Seal the materials properly, especially if using natural stone.
- Style the outer ledge lightly so it stays intentional and not like a storage overflow zone.
Style & Design Tips
Choose a ledge finish that either matches the vanity top or complements the shower tile for a pulled-together look. A clean edge detail makes a huge difference here, so avoid chunky trim pieces that make the wall feel clunky.
Be careful not to overdecorate the outer ledge. A candle and a small tray can look nice, but five bottles, fake greenery, and random clutter will kill the whole point.
Pro Tip or Budget Hack
Use leftover countertop material from the vanity to cap the half wall. Fabricators often have remnants, and that can save money while giving the shower a more expensive custom finish.
5. Marble-Look Half Wall for a Soft Luxury Feel
A lot of bathrooms want to feel luxe but end up feeling cold. A marble-look half wall is a smart middle ground because it gives you that elevated spa vibe without the maintenance drama that real marble sometimes brings along for the ride.
This is a strong option if the bathroom needs brightening or you want the shower to feel elegant without going overboard. I tend to like marble-look porcelain here because it looks polished, holds up well, and doesn’t demand constant babying.
The half wall becomes a focal point when wrapped in soft veining or large-format marble-look tile. It reads upscale right away, but it still keeps the room open and livable.
Why This Works
Marble-look surfaces reflect light nicely and make the shower feel brighter and more refined. On a half wall, that effect is especially useful because the wall is visible from multiple angles and acts like a design anchor.
It also works with a lot of bathroom styles, from classic to modern. The look stays flexible, which means you can change mirrors, hardware, or paint later without making the whole room feel outdated.
How to Do It
- Choose porcelain tile with a realistic marble pattern if you want the look without the extra upkeep.
- Use larger tiles on the half wall to reduce grout lines and create a smoother, more luxurious finish.
- Plan the tile layout before installation so the veining looks intentional instead of random.
- Pair the wall with simple glass and understated hardware to keep the focus balanced.
- Use a coordinating grout color that blends rather than outlines every tile.
Style & Design Tips
Keep the rest of the bathroom restrained so the marble-look finish can breathe. Soft whites, warm greiges, brushed nickel, and natural wood all play nicely with this style and keep it from feeling too cold.
The biggest mistake here is mixing too many “fancy” finishes at once. If the wall already has movement, skip loud floors or flashy fixtures unless the goal is chaos, which I assume it is not.
Pro Tip or Budget Hack
Use marble-look tile on the half wall and a simpler solid tile elsewhere in the shower. That still gives you the expensive visual moment right where it counts while keeping the overall material cost more manageable.
6. Half Wall Shower With Wood-Look Tile Warmth
Bathrooms full of hard surfaces can get sterile in a hurry. A half wall finished with wood-look tile adds warmth and texture without dragging actual wood into the splash zone and hoping for the best.
This idea is great if the bathroom feels a little too sharp, especially with white walls, gray tile, or lots of glass. I’ve always thought wood tones make a bathroom feel more relaxed and lived-in, which is useful when modern spaces start drifting into showroom territory.
Using wood-look tile on the half wall creates contrast in a way that feels grounded and natural. It also helps soften the shower area without making it look overly rustic.
Why This Works
Wood-look tile brings warmth while still standing up to moisture, which makes it practical for a bathroom. On a half wall, it becomes a feature that breaks up the usual sea of stone, ceramic, and metal.
It also gives the room visual depth. The grain pattern adds movement, but because it’s subtle, it does not overwhelm the space the way a bold patterned tile might.
How to Do It
- Pick a porcelain wood-look tile in a tone that complements your vanity and flooring.
- Run the tile horizontally if you want the wall to feel longer, or vertically if you want added height.
- Pair it with clear glass above the wall to keep the warmth from making the shower feel heavy.
- Use waterproof backer and proper sealing at every transition point.
- Repeat the wood tone somewhere else in the room, like shelving or a mirror frame, for balance.
Style & Design Tips
Stay away from orange-heavy wood tones unless the rest of the bathroom is built around them. Warm oak, walnut, and soft driftwood shades tend to feel more current and easier to style.
Also, do not mix three different fake wood finishes in one small bathroom. That usually turns into a weird patchwork situation, and nobody wants their bathroom looking confused.
Pro Tip or Budget Hack
If full wood-look tile on the wall feels pricey, use it only as an accent band or on the bathroom-facing side of the half wall. That keeps the warm visual effect while letting you use a more affordable basic tile inside the shower.
7. Half Wall Divider for a Doorless Walk-In Shower
Doorless walk-in showers look amazing until the layout makes no sense and water ends up halfway across the bathroom floor. A half wall divider helps fix that by guiding movement, blocking splashes, and giving the open shower some much-needed structure.
This setup is perfect for people who like the modern look of a walk-in shower but still want a bit of privacy. I think it’s one of the smartest uses of a half wall because it solves practical problems while still keeping the bathroom feeling open.
The wall usually sits at the entry side of the shower, creating a partial screen as you walk in. That little bit of division goes a long way in making the space feel more intentional and less exposed.
Why This Works
A doorless shower needs smart boundaries, and the half wall helps create them without using a full enclosure. It directs the eye, defines the zone, and keeps the open concept from feeling unfinished.
It also improves comfort in daily use. Even a small privacy screen can make the shower feel more secure, especially in shared bathrooms where fully open designs can feel a bit too committed to the “nothing to hide” lifestyle.
How to Do It
- Position the half wall near the shower entrance to create a visual and physical divider.
- Make sure the showerhead placement directs water away from the opening.
- Extend the wet zone floor tile beyond the wall so the transition looks intentional.
- Use a strong slope toward the drain because open layouts leave less room for drainage mistakes.
- Test the walking path so the shower stays easy to enter without awkward tight turns.
Style & Design Tips
Keep lines simple and the palette cohesive so the walk-in design feels clean, not incomplete. Large tile, minimal trim, and one or two repeat materials usually work best here.
Avoid making the wall too short or too narrow. If it barely blocks anything, it starts looking decorative in the least helpful way possible.
Pro Tip or Budget Hack
A fixed half wall is often cheaper than a custom glass door setup. If the bathroom layout supports it, this can save money on hardware and maintenance while still giving you that modern walk-in shower look.
8. Double-Sided Half Wall With Vanity Separation
In some bathrooms, the shower and vanity area sit so close together that the whole layout feels cramped. A double-sided half wall can separate the shower from the vanity while still keeping the bathroom open, which is a smart move when full walls would make the room feel boxed in.
This design works especially well in larger shared bathrooms or primary baths with open layouts. I like it because it creates zones without turning the room into a maze, and that’s harder to pull off than Pinterest makes it look.
The wall becomes a divider that gives each section its own identity. One side supports the shower, while the other helps frame the vanity area and makes the whole room feel better organized.
Why This Works
Bathrooms function better when wet and dry zones feel distinct. A half wall creates that separation gently, so the room still feels connected but not messy or overly exposed.
It also improves visual flow. Instead of seeing every feature at once, the eye moves through the room in a more controlled way, which makes the space feel calmer and more designed.
How to Do It
- Map out the bathroom layout first so the wall improves movement instead of interrupting it.
- Build the wall where it can serve both the shower and vanity areas without crowding either side.
- Use matching finishes on both faces of the wall so it feels unified from every angle.
- Add glass on the shower side if you still need more splash protection or openness.
- Coordinate nearby lighting and mirrors so the vanity zone still feels bright and accessible.
Style & Design Tips
Treat the wall like part of the room, not just part of the shower. Consistent tile, paint, or stone choices help it feel integrated instead of dropped in as an afterthought.
Don’t overload the wall with too many functions at once. If it is dividing space, holding shelving, supporting glass, and carrying a loud accent tile, that can get messy fast.
Pro Tip or Budget Hack
Use the vanity-facing side for a simple towel hook or slim shelf instead of adding more cabinetry. That gives the wall extra usefulness without raising the build cost too much.
9. Curved Half Wall Shower for a Softer Layout
Straight lines dominate most bathrooms, which is fine until the whole room starts feeling stiff. A curved half wall changes the mood immediately by softening the layout and making the shower feel more custom, more fluid, and honestly a little more interesting.
This idea works best in bathrooms where the layout has enough space to let the curve breathe. I wouldn’t force it into a super tiny room, but in the right setup, it looks thoughtful and high-end without being flashy.
A gentle curve can guide the entry into the shower while creating privacy at the same time. It makes the shower feel less harsh, which is a nice change if everything else in the bathroom is square, flat, and serious.
Why This Works
Curves naturally direct movement, so the shower entrance feels smoother and more inviting. They also reduce the rigid boxed-in feeling that straight partition walls can create.
From a design perspective, a curved half wall adds softness without requiring extra decor. The shape itself becomes the feature, which means the rest of the bathroom can stay simple and still feel special.
How to Do It
- Work with a contractor who has experience framing curves because this is not the place for guesswork.
- Keep the curve subtle so it feels elegant rather than theatrical.
- Use smaller tile pieces or flexible materials where needed to follow the curve cleanly.
- Pair the wall with a simple floor plan so the shape stands out in a good way.
- Consider a curved glass extension only if the budget allows, since custom glass can climb quickly.
Style & Design Tips
Soft, neutral finishes usually work best with curved walls because they let the shape be the main statement. Rounded mirrors, globe lights, or arched details can echo the curve without making the room feel themed.
Avoid combining a curved wall with overly busy tile patterns. Too much movement on top of movement can make the bathroom feel unsettled instead of refined.
Pro Tip or Budget Hack
Skip custom curved glass and leave the top open if your layout controls splash well. You still get the sculptural effect of the curved half wall, but you avoid one of the most expensive parts of the design.
10. Half Wall Shower With Bench Integration
Comfort matters more in bathrooms than people admit. Building a bench into the same structure as a half wall gives the shower extra function, makes the design feel custom, and adds a practical feature you’ll actually use instead of just admiring for two weeks.
This is especially useful in larger showers, aging-friendly remodels, or bathrooms where shaving, bathing kids, or just setting things down is part of real life. I’ve always thought benches make showers feel more finished, and when they connect to a half wall, the whole setup feels intentional.
The bench can extend from the wall or sit directly behind it depending on the layout. Either way, the combination adds comfort, storage potential, and a stronger sense of structure.
Why This Works
A bench adds usability while the half wall adds privacy and definition. Together, they create a shower that feels more complete and better suited to everyday routines.
It also improves visual continuity because the bench and wall can share the same material and lines. That makes the design look custom-built instead of pieced together from random features.
How to Do It
- Decide whether the bench will project from the half wall or sit along the same axis behind it.
- Frame both features together so the proportions feel balanced.
- Waterproof every joint carefully because benches take a lot of direct moisture.
- Use a slight slope on the bench top so water drains properly.
- Finish the wall and bench in matching tile for a seamless built-in look.
Style & Design Tips
Keep the bench size proportional to the shower so it feels useful without eating the whole floor plan. Simple rectangular forms usually look better than overly detailed shapes in modern and transitional bathrooms.
Do not forget comfort when picking materials. Super slippery polished tile on a bench sounds pretty until real life shows up with wet legs and zero patience.
Pro Tip or Budget Hack
A floating-look bench using the same wall tile can create a custom feel without fancy stone fabrication. If you want the shower to look pricier than it was, that’s a solid move.
11. Minimalist Half Wall Shower in One Continuous Finish
Some bathrooms look better when nothing fights for attention. A minimalist half wall shower finished in one continuous tile or stone-look surface creates a calm, clean effect that feels modern without becoming cold or sterile.
This idea is perfect if you like a clutter-free bathroom and want the half wall to blend into the architecture. I love this approach when the goal is quiet luxury, because it feels expensive in that understated way that does not beg for compliments but still gets them.
The same finish can run across the half wall, shower walls, and even part of the floor. That continuity helps the room feel larger, smoother, and far more intentional.
Why This Works
Using one main finish reduces visual breaks, which makes the bathroom feel bigger and more cohesive. A half wall usually creates a transition point, but when the materials stay consistent, that transition feels smooth instead of abrupt.
It also makes the space easier to style. With fewer competing surfaces, your fixtures, towels, lighting, and mirror choices stand out more naturally.
How to Do It
- Choose a versatile tile or slab-look porcelain that can work across multiple surfaces.
- Use the same material on the half wall and nearby shower surfaces for continuity.
- Keep grout lines thin and consistent to preserve the minimalist look.
- Pair the wall with simple glass and minimal hardware.
- Limit extra accents so the finish and layout stay the focus.
Style & Design Tips
Minimalist does not mean boring when the texture and scale are right. Large-format tile, soft matte finishes, and warm neutral tones usually create the best balance between clean and comfortable.
The mistake here is adding random “interest” after the fact. If the design is meant to feel calm, do not suddenly throw in a loud mosaic strip or dramatic feature wall just because the bathroom started looking too sensible.
Pro Tip or Budget Hack
Use one mid-range porcelain tile throughout instead of mixing several expensive materials. That keeps the look sleek, simplifies installation, and often saves money on both labor and waste.
Final Thoughts
The best half wall shower ideas do not just look good in photos. They solve real layout problems, add privacy where it matters, and make the bathroom feel more finished without closing everything off.
I’d always choose the version that fits the room first and the trend second. A smart bathroom lasts longer than a trendy one, and that’s my favorite kind of design decision.