13 Walk-In Shower With Bench Ideas That Feel Practical and Pretty
A walk-in shower bench either becomes the most used feature in the bathroom or just sits there collecting shampoo bottles. The difference usually comes down to how well it fits your daily routine and how naturally it blends into the space. I’ve seen benches that feel like an afterthought, and others that quietly make the whole shower feel more usable.
The good news is you don’t need a massive bathroom or a luxury budget to get this right. Small design tweaks, smart placement, and a bit of planning can turn a basic bench into something that actually improves how you use the space every day.
1. Floating Corner Bench for Small Showers
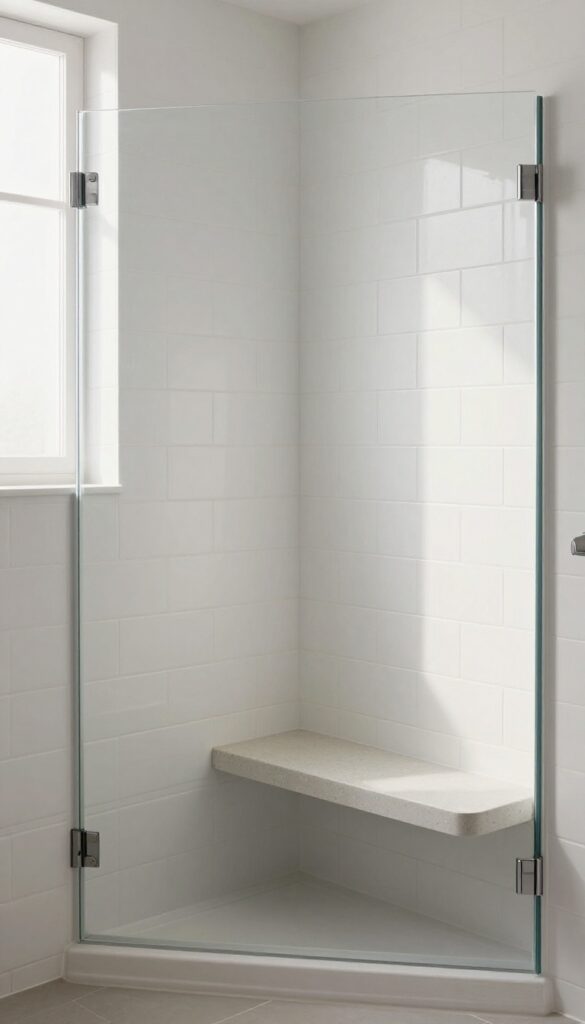
Trying to squeeze a bench into a tight shower often ends up making everything feel cramped. A floating corner bench solves that by using space that usually goes wasted while keeping the floor visually open. I’ve used this in a small bathroom once, and it instantly made the shower feel less boxed in.
It works especially well when you want functionality without sacrificing movement. You still get a spot to sit or place products, but nothing feels bulky or intrusive.
Why This Works
Corners naturally break up visual weight, so placing a bench there keeps the layout balanced. The floating design also lets light and tile patterns continue underneath, which makes the shower look bigger.
How to Do It
- Choose a triangular or curved bench shape to match the corner
- Mount it securely into wall studs or reinforced backing
- Use waterproof materials like quartz or sealed stone
- Keep the height around 17–19 inches for comfortable seating
Style & Design Tips
Use the same tile on the wall behind the bench to keep things seamless. Avoid bulky supports underneath, because they defeat the “floating” look completely.
Pro Tip or Budget Hack
If custom stone feels expensive, go for a tiled bench with a solid backer board. It gives a similar look at a fraction of the cost.
2. Full-Length Built-In Bench Along the Wall
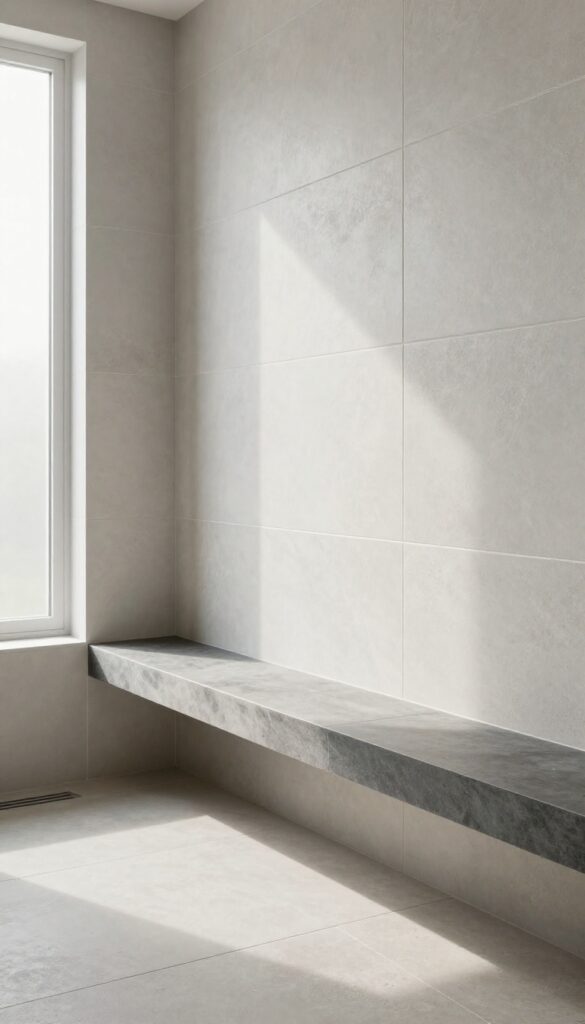
Some showers feel empty along one long wall, and that’s actually wasted potential. A full-length bench turns that unused stretch into a functional zone that feels intentional. I personally like this setup when multiple people use the same bathroom.
It gives you space to sit, stretch, or just keep everything organized without stacking bottles everywhere.
Why This Works
Long horizontal lines make a space feel wider and calmer. A full-length bench also distributes visual weight evenly instead of concentrating it in one spot.
How to Do It
- Build the bench across one full wall of the shower
- Use a waterproof core like cement board or foam panels
- Slightly slope the top to prevent water pooling
- Finish with tile, stone, or quartz
Style & Design Tips
Go for a contrasting bench top if you want it to stand out. If you prefer a cleaner look, match it exactly with the wall tile.
Pro Tip or Budget Hack
Instead of expensive slab materials, use larger format tiles for the bench surface. Fewer grout lines make it look more high-end.
3. Bench with Built-In Storage Niche
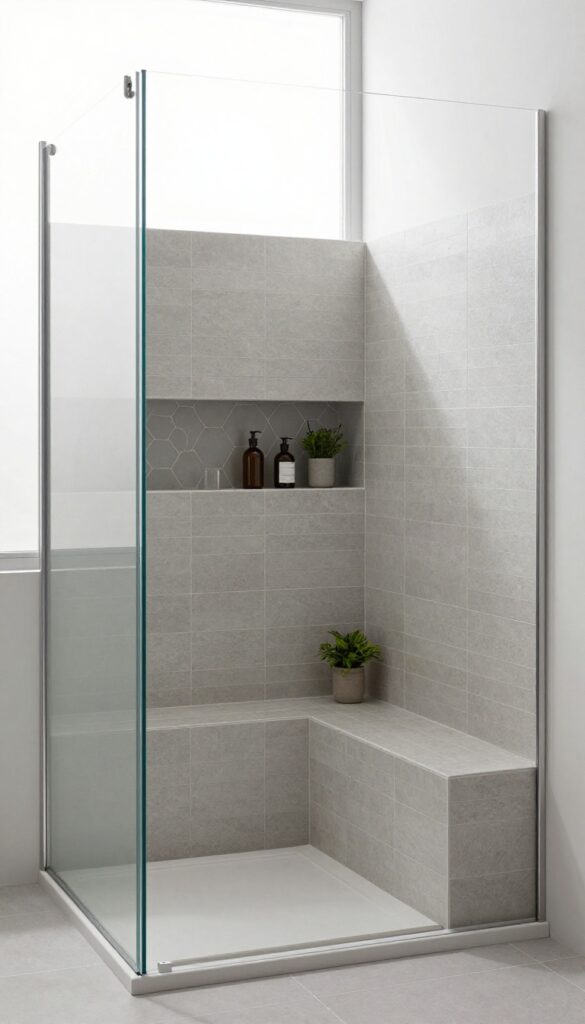
A bench alone is useful, but pairing it with storage makes it way more practical. Adding a niche right above or beside the bench creates a small “zone” where everything stays within reach. I’ve tried this setup, and it cuts down the chaos of bottles all over the place.
It’s one of those upgrades that feels small but changes how you use the shower daily.
Why This Works
Combining seating and storage creates a functional cluster. You reduce movement and keep essentials exactly where you need them.
How to Do It
- Plan the niche height so it aligns with your sitting position
- Frame the niche during construction or renovation
- Waterproof thoroughly using a membrane system
- Tile both the niche and bench in coordinating materials
Style & Design Tips
Use a slightly different tile inside the niche for contrast. Just don’t go too bold unless you want it to be a focal point.
Pro Tip or Budget Hack
Pre-made niche inserts save time and reduce installation mistakes. They’re surprisingly affordable and very beginner-friendly.
4. Marble Slab Bench for a Luxe Feel
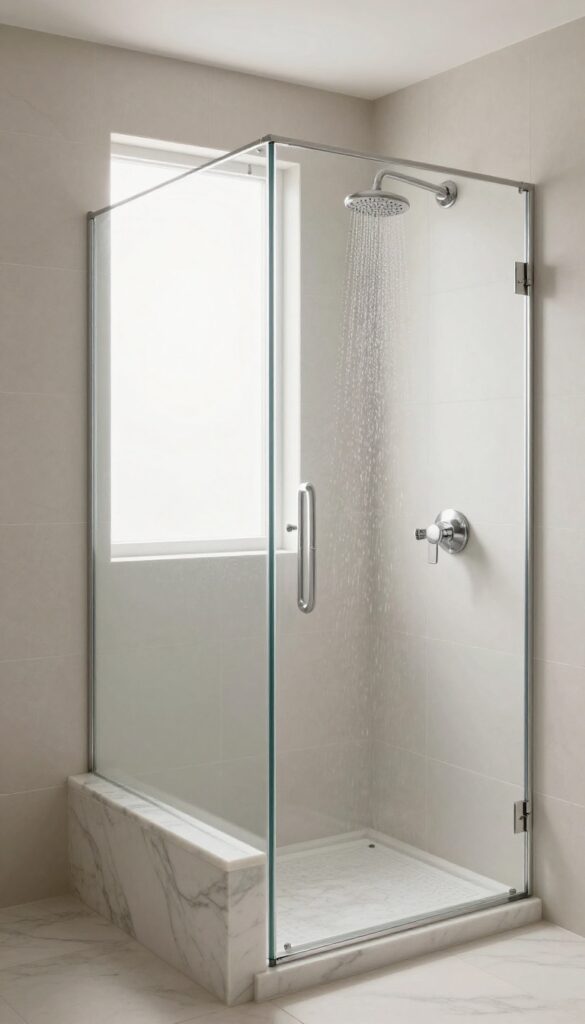
Some bathrooms just need that one element that elevates everything. A marble slab bench does exactly that without requiring a full luxury renovation. I’ve seen even simple bathrooms look upgraded instantly with this one change.
It’s clean, polished, and feels a bit indulgent in the best way.
Why This Works
Natural stone adds texture and variation that manufactured materials can’t fully replicate. The smooth surface also reflects light slightly, adding brightness.
How to Do It
- Choose a thick marble or quartz slab for durability
- Ensure proper support underneath to handle weight
- Seal the surface regularly to prevent staining
- Pair with neutral or soft-toned tiles
Style & Design Tips
Stick with subtle veining for a timeless look. Overly dramatic patterns can feel dated quickly.
Pro Tip or Budget Hack
Quartz gives a similar aesthetic with less maintenance. It’s a smart swap if you don’t want to deal with sealing.
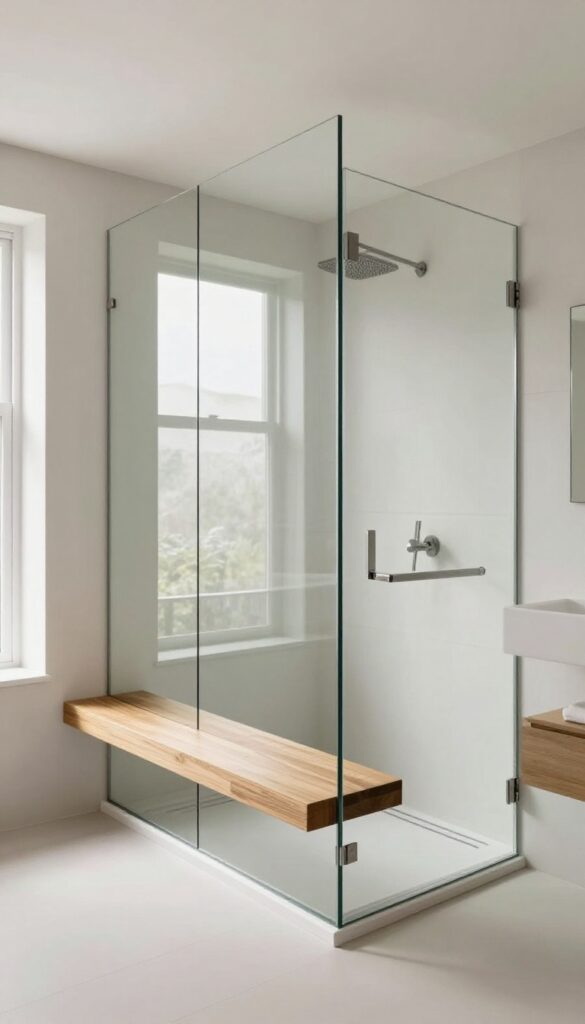
5. Wooden Teak Shower Bench Insert
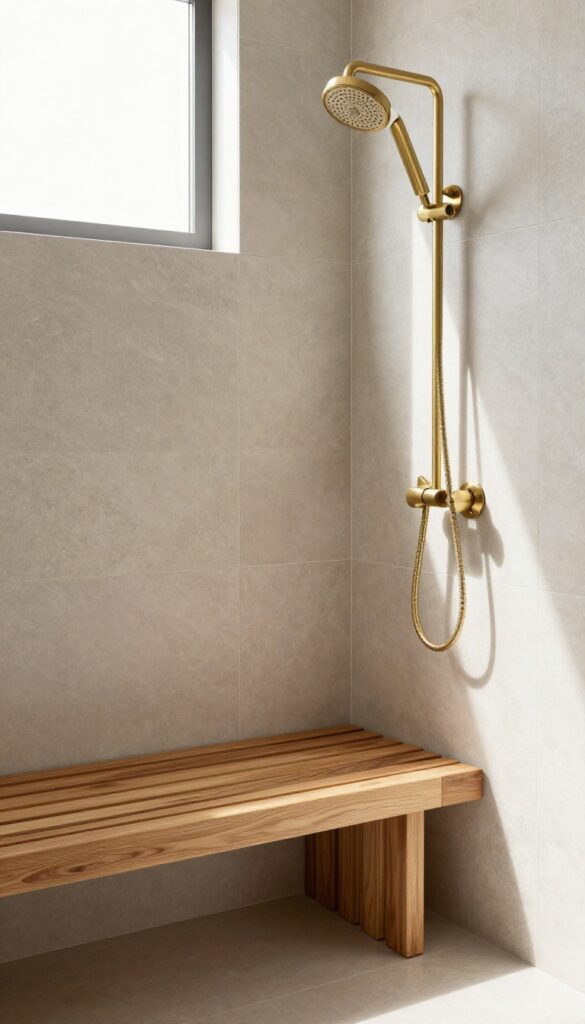
Permanent benches aren’t always ideal, especially in smaller or rented spaces. A teak bench gives you flexibility while still looking intentional. I’ve used one before, and it surprisingly made the shower feel warmer and more inviting.
It’s one of those simple additions that doesn’t feel temporary.
Why This Works
Wood adds warmth and contrast to typically cold tile surfaces. Teak specifically resists water and holds up well in humid environments.
How to Do It
- Choose a teak or bamboo bench designed for wet areas
- Place it in a stable corner or along a wall
- Ensure proper drainage underneath
- Clean and oil occasionally to maintain finish
Style & Design Tips
Pair it with matte black or brushed brass fixtures for a modern look. Avoid overly glossy tiles if you want a balanced feel.
Pro Tip or Budget Hack
Look for foldable teak benches if space is tight. You can tuck them away when not in use.
6. Curved Bench for Softer Visual Flow
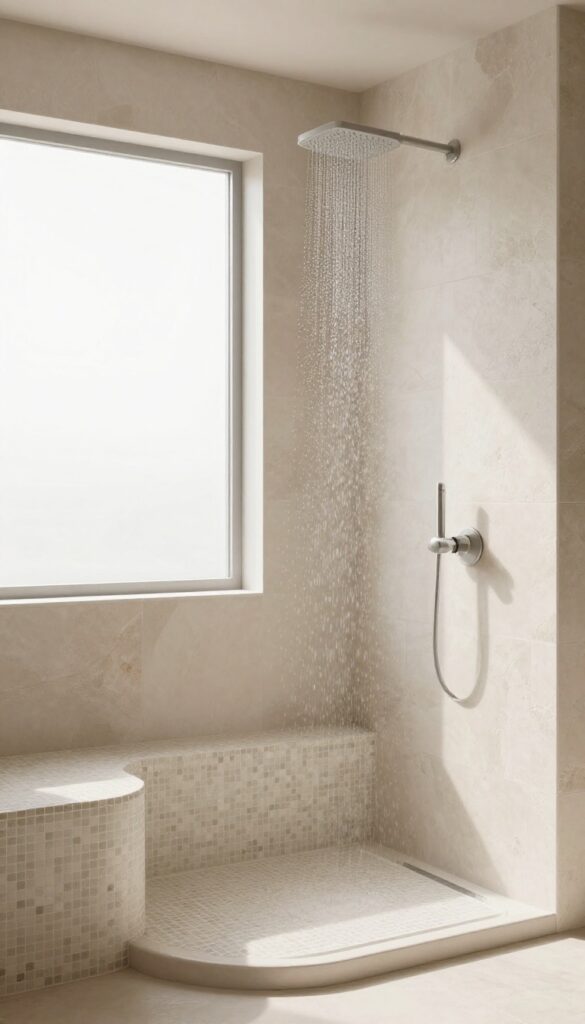
Sharp corners can make a shower feel rigid and boxed in. A curved bench softens the layout and adds a subtle design element. I didn’t expect it to make such a difference until I saw one in person—it just felt smoother overall.
It’s a small change that shifts the entire vibe.
Why This Works
Curves guide the eye naturally, creating a more relaxed visual flow. They also reduce harsh edges in compact spaces.
How to Do It
- Frame the bench with a curved front edge
- Use flexible tile backing materials
- Choose smaller tiles for easier shaping
- Finish with grout that blends well
Style & Design Tips
Mosaic tiles work best for curves. Larger tiles tend to look awkward when forced into rounded shapes.
Pro Tip or Budget Hack
Pre-curved foam bench kits are easier to install than building from scratch. They save time and reduce errors.
7. Bench with Under-Bench Lighting
Most shower lighting focuses on the ceiling, which leaves lower areas feeling dim. Adding subtle lighting under the bench creates a soft glow that feels both functional and stylish. I’ve seen this in a friend’s bathroom, and it instantly felt more high-end.
It’s not necessary, but it’s definitely a nice upgrade.
Why This Works
Layered lighting adds depth and improves visibility. It also highlights the bench without overwhelming the space.
How to Do It
- Install waterproof LED strips under the bench edge
- Connect to a safe, low-voltage power source
- Use warm white lighting for a cozy feel
- Seal all connections properly
Style & Design Tips
Keep the lighting subtle, not overly bright. The goal is a glow, not a spotlight.
Pro Tip or Budget Hack
Motion-sensor LED strips can reduce energy use and feel a bit futuristic without much extra cost.
8. Contrasting Tile Bench Design
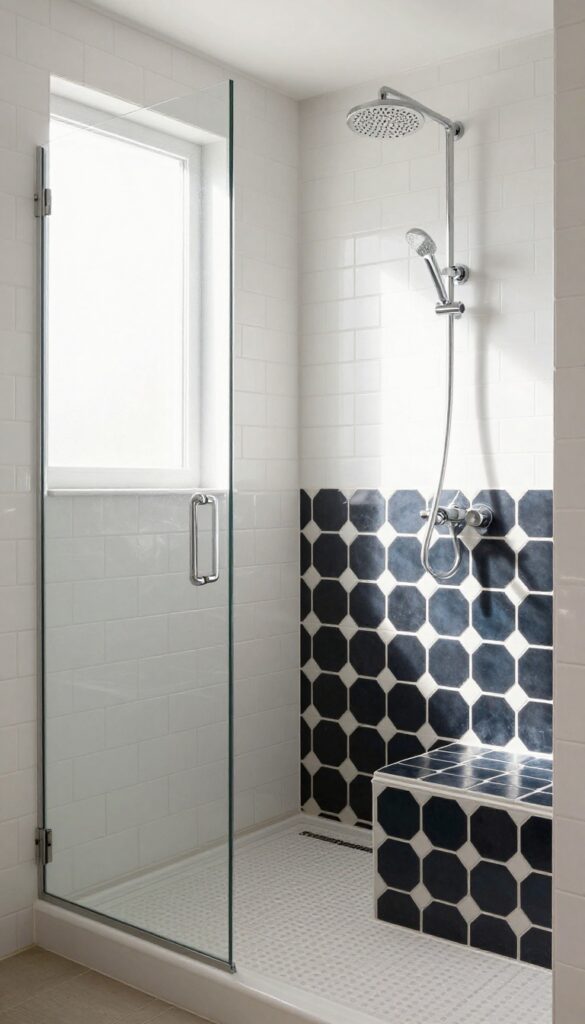
Sometimes everything in a shower blends too much and feels flat. A contrasting tile bench breaks that up and gives your eyes something to focus on. I like using this trick when the rest of the shower is very neutral.
It adds personality without overwhelming the space.
Why This Works
Contrast creates visual interest and defines different zones. It helps the bench stand out as a purposeful feature.
How to Do It
- Choose a tile color or pattern that complements the main walls
- Limit contrast to the bench area only
- Keep grout lines clean and consistent
- Balance boldness with simplicity
Style & Design Tips
Avoid clashing patterns or overly busy designs. One strong contrast is enough.
Pro Tip or Budget Hack
Use leftover tiles from another project to create contrast. It’s an easy way to save money and reduce waste.
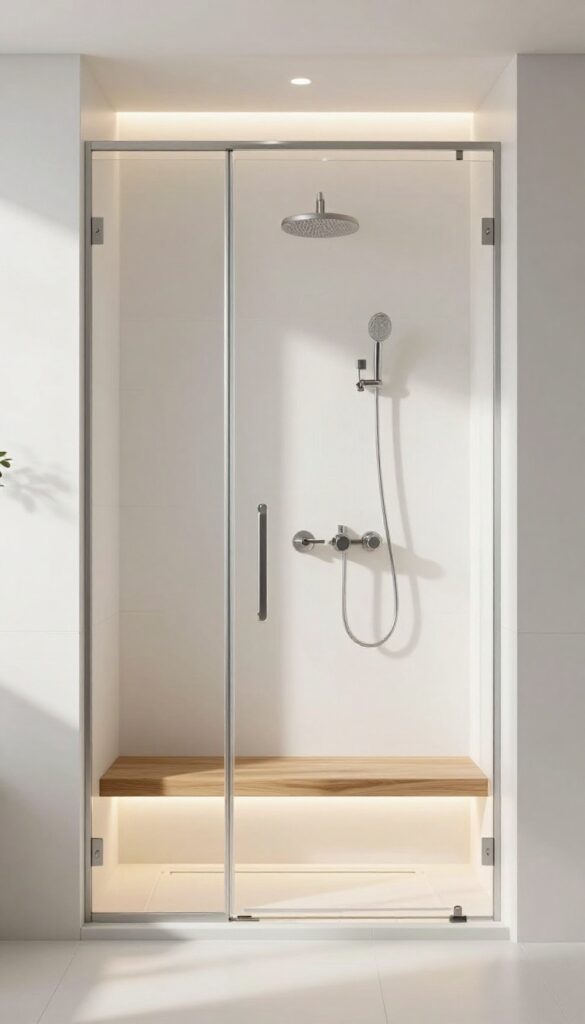
9. Bench with Glass Partition Integration
Open walk-in showers can sometimes feel too exposed or splash-prone. Integrating a bench with a glass partition creates a subtle boundary without closing things off. I’ve seen this setup work really well in modern bathrooms.
It keeps things open but still controlled.
Why This Works
The bench acts as a visual anchor while the glass provides separation. Together, they create structure without heaviness.
How to Do It
- Position the bench near the glass divider
- Use frameless glass for a cleaner look
- Ensure proper sealing to prevent leaks
- Align edges for a cohesive design
Style & Design Tips
Keep hardware minimal and finishes consistent. Too many metal tones can feel messy.
Pro Tip or Budget Hack
Half-glass panels cost less than full enclosures and still give a similar effect.
10. Fold-Down Wall Bench for Flexibility
Not every shower needs a permanent bench taking up space. A fold-down option gives you seating only when you need it. I’ve recommended this to someone with a really tight bathroom, and it worked surprisingly well.
It’s practical without committing to a fixed layout.
Why This Works
Flexibility allows better space management. You keep the shower open when the bench isn’t in use.
How to Do It
- Install a wall-mounted fold-down bench
- Anchor it securely into studs
- Choose rust-resistant materials
- Test weight capacity before regular use
Style & Design Tips
Pick a design that blends with your fixtures. Bulky designs can look out of place.
Pro Tip or Budget Hack
Look for medical-grade fold-down benches—they’re sturdy and often more affordable than designer versions.
11. Bench with Matching Floor Extension
Some benches feel disconnected from the rest of the shower. Extending the same tile from the floor onto the bench creates a seamless transition. I’ve done this once, and it made everything feel more cohesive instantly.
It’s simple but very effective.
Why This Works
Continuity in materials reduces visual breaks. It makes the space feel larger and more unified.
How to Do It
- Use the same tile on both floor and bench
- Align grout lines for consistency
- Maintain proper slope for drainage
- Seal everything properly
Style & Design Tips
Stick with neutral tones for a timeless look. Matching bold tiles can feel overwhelming.
Pro Tip or Budget Hack
Buy extra tiles during your project to ensure perfect matches later. Batch differences can be noticeable.
12. Minimalist Floating Slab Bench

Sometimes less really does more. A simple slab bench with clean lines can feel more modern than elaborate designs. I personally prefer this style in contemporary bathrooms.
It’s understated but still very functional.
Why This Works
Minimal designs reduce visual clutter and keep focus on the overall layout. Clean lines also make maintenance easier.
How to Do It
- Use a single slab material like quartz or stone
- Mount it securely with hidden supports
- Keep edges sharp and clean
- Pair with simple tile patterns
Style & Design Tips
Avoid decorative edges or heavy detailing. The beauty comes from simplicity.
Pro Tip or Budget Hack
Engineered stone slabs often cost less than natural stone while offering similar durability.
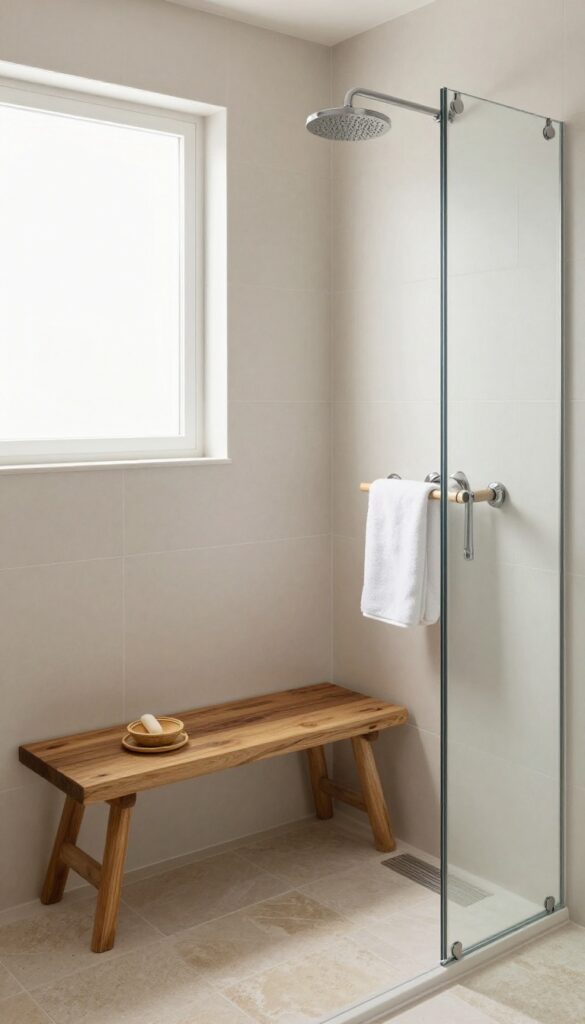
13. Bench at Entry Zone for Convenience
Placing a bench near the shower entry makes getting in and out easier. It’s especially useful for shaving, drying, or just taking a quick pause. I didn’t think I’d use it much until I actually had one—it became a daily habit.
It’s one of those practical placements that just makes sense.
Why This Works
Positioning the bench near the entry improves accessibility. It creates a transition zone between wet and dry areas.
How to Do It
- Install the bench near the shower opening
- Ensure water doesn’t pool in that area
- Use slip-resistant materials
- Keep the height comfortable
Style & Design Tips
Blend the bench with surrounding tiles for a natural look. Avoid making it feel like a separate add-on.
Pro Tip or Budget Hack
A small prefabricated bench can work here without major construction. It’s a quick upgrade with real impact.
Final Thoughts
A shower bench sounds like a small detail, but it quietly changes how the entire space functions. The right one makes daily routines easier without drawing too much attention to itself.
Pick a design that fits your space and how you actually use your bathroom. I’d always lean toward practicality first, then style naturally follows.