13 Stand-Up Shower Ideas for a Bathroom That Feels More Open
Bulky layouts tend to shrink a bathroom faster than anything else. Stand-up showers solve that by clearing visual space and tightening how everything functions.
Some setups feel instantly airy, while others still look cramped even without a tub. That usually comes down to layout choices, materials, and a few small details people overlook.
I’ve tried a few of these ideas myself and messed up enough along the way to know what actually works in real life. The difference between “looks good online” and “feels good daily” is honestly bigger than most people expect.
So if the goal is a bathroom that feels open without a full renovation headache, these ideas are the ones worth focusing on.
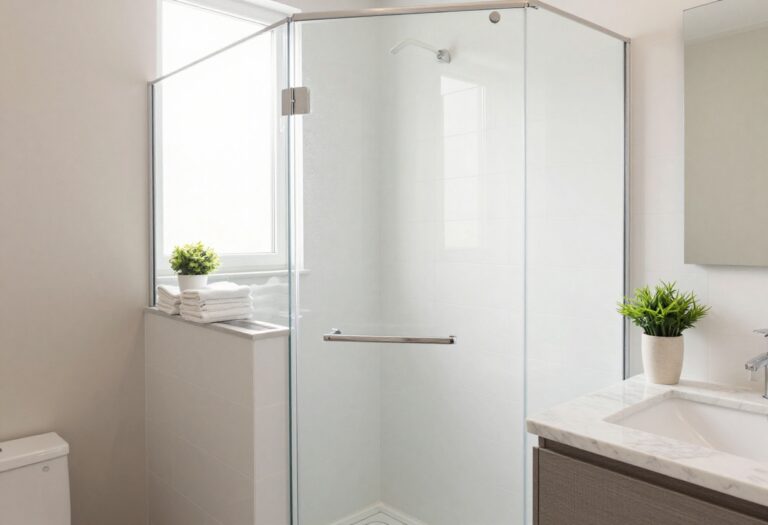
1. Frameless Glass Shower Panels
Heavy frames and bulky doors can make even a decent-sized bathroom feel boxed in. Swapping to frameless glass panels instantly removes that visual barrier and makes everything feel more connected.
I didn’t expect such a simple change to make a difference, but it honestly made my bathroom feel like it gained extra square footage. It’s one of those upgrades that feels subtle until you live with it.
Why This Works
Frameless glass keeps sightlines uninterrupted, which tricks the eye into reading the entire space as one open area. There’s no visual stopping point, so the room feels larger than it actually is.
It also allows light to travel freely, which matters more than people think in smaller bathrooms.
How to Do It
- Measure your shower space precisely before ordering panels
- Choose tempered glass for safety and durability
- Install minimal hardware or hidden brackets
- Keep edges clean and silicone lines neat
Each step matters because even small visual clutter can cancel out the “open” effect.
Style & Design Tips
Stick with clear glass instead of frosted if your goal is openness. Frosted panels look nice, but they visually close off the space.
Avoid bulky handles or dark metal frames unless you want contrast. Light finishes tend to feel less heavy.
Pro Tip or Budget Hack
If full frameless feels expensive, go semi-frameless with ultra-thin edges. It gives a similar look without the full price tag.
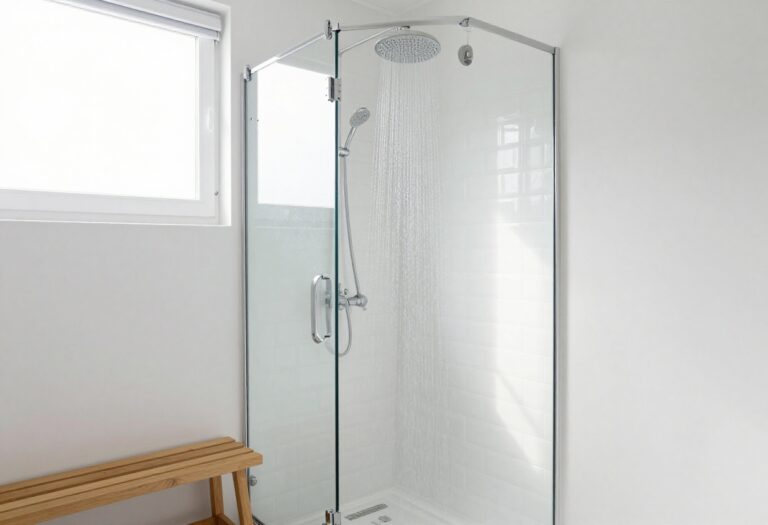
2. Corner Stand-Up Shower Layout
Wasted corners are one of the biggest missed opportunities in bathroom design. A corner stand-up shower uses that dead space and frees up the rest of the layout.
I’ve seen this work especially well in small bathrooms where every inch matters. It instantly makes the room feel less crowded without needing structural changes.
Why This Works
Corners naturally break up space, so placing the shower there keeps the central area open. It improves flow and gives more usable room for movement.
It also reduces visual overlap between fixtures, which keeps things from feeling cluttered.
How to Do It
- Choose a curved or angled shower base to soften the corner
- Install sliding or pivot doors depending on space
- Keep surrounding walls minimal and clean
- Use compact fixtures to avoid crowding
The goal is to make the shower feel integrated, not squeezed in.
Style & Design Tips
Curved glass doors feel more open than sharp angles. They soften the layout and make movement easier.
Stick with light tiles or neutral tones to keep the corner from looking heavy.
Pro Tip or Budget Hack
Pre-made corner shower kits are cheaper and easier to install than custom builds. They’re not flashy, but they get the job done cleanly.
3. Curbless Walk-In Shower
Step-up edges can visually cut a bathroom into sections. Removing that curb creates a seamless flow from floor to shower.
I tried this in a remodel, and it completely changed how the space felt. It’s one of those upgrades that looks high-end but also makes daily use easier.
Why This Works
A continuous floor surface makes the room feel uninterrupted. Without that raised edge, your eye reads the entire space as one level.
It also improves accessibility, which is a practical bonus.
How to Do It
- Ensure proper floor slope for drainage
- Use linear drains for a cleaner look
- Waterproof the entire shower area carefully
- Extend the same flooring throughout
Skipping proper slope is where most people mess this up.
Style & Design Tips
Use large-format tiles to reduce grout lines and keep things visually smooth. Smaller tiles can make the space feel busy.
Keep color transitions minimal to maintain that seamless look.
Pro Tip or Budget Hack
If full curbless isn’t possible, go for a low-profile threshold. It gives a similar effect without major structural work.
4. Vertical Tile Patterns
Horizontal lines can sometimes make a space feel wider but shorter. Vertical tile patterns draw the eye upward and create a sense of height.
I didn’t think this mattered much until I saw it in person. It subtly changes how tall the room feels, especially in compact bathrooms.
Why This Works
Vertical lines guide the eye upward, making ceilings appear higher. That visual trick adds openness without changing the actual structure.
It also adds movement to otherwise plain walls.
How to Do It
- Choose rectangular tiles like subway or stacked tiles
- Install them vertically instead of the traditional layout
- Keep spacing consistent for a clean finish
- Use matching grout for a seamless look
Consistency is key here, or it starts to look messy fast.
Style & Design Tips
Stick with neutral or soft tones to avoid overwhelming the space. Bold colors can work, but they need balance.
Avoid mixing too many patterns in the same shower area.
Pro Tip or Budget Hack
Basic subway tiles installed vertically can look designer-level without the high cost. It’s all about placement, not price.
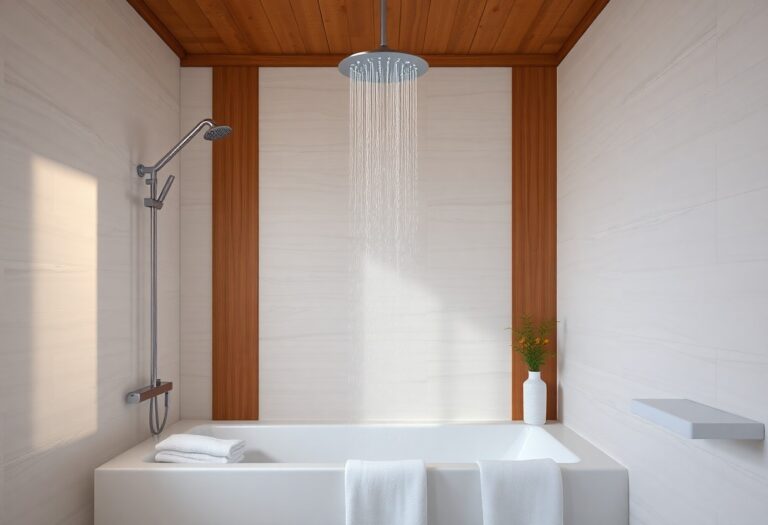
5. Light-Colored Shower Tiles
Dark tiles can feel rich, but they also absorb light and shrink the space visually. Lighter tones reflect light and make everything feel more open.
I’ve used both, and honestly, light tiles win every time in small bathrooms. They just make the space feel easier to breathe in.
Why This Works
Light colors reflect both natural and artificial light. This brightens the space and removes shadows that make rooms feel tight.
It also keeps the shower from becoming a visual block.
How to Do It
- Choose shades like white, beige, or soft gray
- Pair with matching or slightly darker grout
- Use consistent tones across walls and floors
- Add subtle texture for interest
Texture helps prevent the space from feeling flat.
Style & Design Tips
Avoid stark white if you want warmth. Slightly warmer tones feel more inviting.
Use matte finishes to avoid excessive glare.
Pro Tip or Budget Hack
Mix affordable ceramic tiles with a few accent pieces to create a high-end look without overspending.
6. Open Shelf Shower Storage
Bulky cabinets inside showers can make things feel cramped. Open shelving keeps storage functional without closing off space.
I used to overthink storage until I realized less structure actually looks better. It’s cleaner and easier to maintain.
Why This Works
Open shelves reduce visual weight compared to closed units. They keep everything accessible while maintaining an airy feel.
They also allow better organization without crowding.
How to Do It
- Build recessed niches into the wall
- Keep shelf sizes proportional to the space
- Use waterproof materials
- Arrange items neatly to avoid clutter
Messy shelves defeat the purpose, so keep it minimal.
Style & Design Tips
Stick with matching tile inside niches for a seamless look. Contrasting tiles can work but need careful balance.
Avoid overcrowding with too many products.
Pro Tip or Budget Hack
One well-placed niche works better than multiple small ones. It keeps the design clean and intentional.
7. Sliding Glass Shower Doors
Swing doors need space to open, which can limit layout options. Sliding doors solve that by staying within the shower footprint.
I’ve found this especially useful in tighter bathrooms where every inch counts. It keeps things functional without compromising flow.
Why This Works
Sliding doors eliminate the need for clearance space. This allows better use of surrounding areas and keeps movement easy.
They also maintain clean lines, which supports an open feel.
How to Do It
- Choose smooth-glide tracks for durability
- Install clear glass panels
- Keep frames minimal
- Ensure proper alignment during installation
Poor alignment can cause long-term issues, so don’t rush this step.
Style & Design Tips
Go for thin metal finishes if you want a modern touch. Thick frames can feel bulky.
Keep hardware simple to avoid visual clutter.
Pro Tip or Budget Hack
Standard sliding door kits are more affordable than custom glass options and still look great.
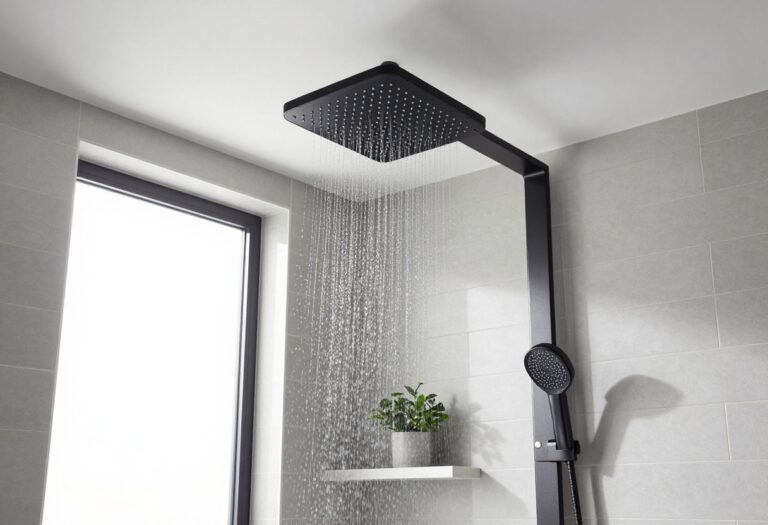
8. Minimalist Shower Fixtures
Oversized fixtures can dominate a small space. Minimalist designs keep things functional without overwhelming the layout.
I switched to simpler fixtures once and never went back. It just feels cleaner and less chaotic.
Why This Works
Smaller, streamlined fixtures reduce visual noise. This keeps the focus on the overall space rather than individual elements.
It also improves usability by keeping everything easy to reach.
How to Do It
- Choose compact showerheads and controls
- Stick with simple shapes and finishes
- Avoid bulky or decorative designs
- Keep placement practical
Function always comes before style here.
Style & Design Tips
Matte finishes like black or brushed nickel add style without being flashy.
Avoid mixing too many finishes in one area.
Pro Tip or Budget Hack
Basic fixtures with clean lines often look better than expensive, overly designed ones.
9. Large Format Floor Tiles
Small tiles create more grout lines, which can make a space feel busy. Large tiles simplify the look and create a smoother visual flow.
I didn’t expect this to matter much, but it completely changed how calm the space felt. Less visual noise makes a big difference.
Why This Works
Fewer grout lines mean fewer visual interruptions. This keeps the floor looking continuous and open.
It also makes cleaning easier, which is a bonus.
How to Do It
- Choose tiles at least 12×24 inches
- Use minimal grout lines
- Ensure proper leveling during installation
- Match floor and wall tones when possible
Precision matters more with larger tiles.
Style & Design Tips
Stick with neutral colors for a timeless look. Bold patterns can feel overwhelming in small spaces.
Avoid high contrast grout unless you want a defined look.
Pro Tip or Budget Hack
Porcelain tiles offer durability and a high-end look without the cost of natural stone.
10. Glass Partition Instead of Full Enclosure
Fully enclosed showers can feel boxed in, especially in smaller bathrooms. A simple glass partition keeps water contained while leaving the space open.
I’ve seen this in a few modern designs, and it always feels more relaxed and less restrictive. It’s surprisingly practical too.
Why This Works
Partial enclosures maintain openness while still providing function. They reduce visual barriers without sacrificing usability.
They also make the room feel less segmented.
How to Do It
- Install a fixed glass panel on one side
- Ensure proper drainage to prevent splashing
- Keep the opening wide enough for easy access
- Use high-quality seals
Balance is key between openness and practicality.
Style & Design Tips
Keep the glass clear and hardware minimal.
Avoid adding unnecessary elements that close off the design.
Pro Tip or Budget Hack
A single glass panel costs less than a full enclosure and still delivers a modern look.
11. Built-In Bench Seating
Standing showers don’t have to mean zero comfort. A built-in bench adds function without taking away openness if done right.
I wasn’t sold on this at first, but it’s surprisingly useful. It also adds a subtle luxury feel without going overboard.
Why This Works
A bench provides utility without adding bulky furniture. When integrated properly, it blends into the design instead of standing out.
It also improves usability for different needs.
How to Do It
- Build the bench into the wall structure
- Use the same tile for a seamless look
- Keep proportions balanced
- Ensure proper waterproofing
Integration is what makes it work visually.
Style & Design Tips
Avoid oversized benches that dominate the space.
Keep edges clean and lines simple.
Pro Tip or Budget Hack
A small corner bench can provide the same function without taking up much space.
12. Consistent Color Palette
Mixing too many colors can make a bathroom feel chaotic. A consistent palette keeps everything cohesive and open.
I’ve experimented with bold contrasts, and honestly, they rarely work in small spaces. Simplicity usually wins here.
Why This Works
Consistency reduces visual breaks and keeps the eye moving smoothly across the space. This creates a sense of openness.
It also makes the design feel intentional.
How to Do It
- Choose 2–3 main colors
- Repeat them across tiles, fixtures, and accessories
- Keep transitions subtle
- Avoid clashing tones
Less variation leads to a cleaner look.
Style & Design Tips
Use soft neutrals with one accent color for balance.
Avoid overly bright or harsh combinations.
Pro Tip or Budget Hack
Stick with one tile style and change layout patterns instead of buying multiple designs.
13. Strategic Lighting Placement
Poor lighting can make even a good design feel cramped. Proper placement opens up the space and highlights key areas.
I underestimated lighting for years, but once I got it right, everything looked better instantly. It’s honestly one of the easiest upgrades.
Why This Works
Good lighting eliminates shadows and enhances depth. This makes the space feel larger and more inviting.
It also improves functionality for daily use.
How to Do It
- Install overhead lighting for general illumination
- Add wall-mounted lights for balance
- Use waterproof fixtures inside the shower
- Position lights to avoid harsh shadows
Placement matters more than brightness alone.
Style & Design Tips
Warm white lighting feels more inviting than cool tones.
Avoid overly bright lights that create glare.
Pro Tip or Budget Hack
LED fixtures are energy-efficient and long-lasting, making them a smart investment.
Final Thoughts
Small design changes can shift how a bathroom feels more than major renovations sometimes do. The key is choosing ideas that actually improve flow instead of just adding visual interest.
I’ve learned that the best setups are the ones that feel effortless day to day. If it looks good but feels annoying to use, it’s not worth it.