10 Large White Tile Shower Ideas for a Bright Polished Look
Large white tiles tend to solve more problems than people expect, especially in bathrooms that feel cramped or visually busy. They simplify the space, reduce visual clutter, and make everything look more intentional without trying too hard.
Most people either overcomplicate their shower design or play it too safe, and both approaches miss the sweet spot. The goal isn’t just “white tiles everywhere,” it’s how you use them to create flow, contrast, and a polished finish that actually feels lived-in.
I’ve tried a few of these ideas myself and honestly, the difference between a basic white shower and a well-thought-out one is huge. Let’s go through the ones that actually work in real homes, not just in perfectly staged photos.
1. Floor-to-Ceiling Large White Tiles
Trying to make a bathroom feel taller often leads people to add vertical accents or weird paint tricks that don’t quite land. Covering the entire shower wall with large white tiles from floor to ceiling does the job cleanly without forcing anything.
It creates one uninterrupted surface, which makes the space feel bigger and more cohesive. I used this in a smaller bathroom once, and it instantly looked like I’d knocked down a wall (I didn’t, but it felt like it).
Why This Works
Continuous vertical coverage removes visual breaks, which tricks the eye into reading the space as taller. Fewer grout lines also keep things calm and polished.
How to Do It
- Use rectified large tiles for tighter grout lines
- Run tiles straight up to the ceiling without trim gaps
- Keep grout color close to tile color for a seamless look
- Plan tile layout before installation to avoid awkward cuts
Style & Design Tips
Stick with matte or soft satin finishes if you want a modern feel that doesn’t glare under lighting. Avoid mixing too many accent strips here, because it breaks the clean effect.
Pro Tip or Budget Hack
If full tiling feels expensive, extend tiles just above the showerhead and paint the rest in a matching tone. Most people won’t notice the difference.
2. Large White Tiles with Dark Grout Contrast
White tiles can sometimes look too plain if everything blends together. Adding dark grout gives structure and turns simple tiles into a design feature without adding extra materials.
This approach works especially well if you like a slightly bold, graphic look without committing to colored tiles. I’ve seen this transform a basic bathroom into something that feels intentional and a bit edgy.
Why This Works
Contrast highlights the shape and layout of each tile, creating visual rhythm. It also hides minor grout stains better over time.
How to Do It
- Choose charcoal or medium gray grout, not pure black
- Keep tile spacing consistent for clean lines
- Use large rectangular tiles for a grid effect
- Seal grout properly to maintain color
Style & Design Tips
Pair this look with black fixtures or frames to tie everything together. Avoid mixing too many other patterns, or it can start to feel busy.
Pro Tip or Budget Hack
Use dark grout only on the shower walls and lighter grout on the floor to keep the space from feeling too heavy.
3. Horizontal Stack Layout for a Wider Feel
Narrow bathrooms often feel tighter than they actually are, especially around the shower area. Laying large white tiles in a horizontal stack helps stretch the space visually.
Instead of the usual staggered brick pattern, this layout keeps everything aligned and modern. It’s one of those subtle changes that quietly improves the entire room.
Why This Works
Horizontal lines draw the eye across the space, making it appear wider. The clean alignment also feels more contemporary than traditional layouts.
How to Do It
- Use rectangular large tiles for best effect
- Align edges perfectly in a stacked pattern
- Maintain even grout spacing throughout
- Double-check leveling to avoid visible shifts
Style & Design Tips
Keep grout lines thin and close in color to the tile for a sleek finish. Too much contrast here can disrupt the horizontal flow.
Pro Tip or Budget Hack
If your tiles aren’t perfectly uniform, a slight stagger (just a few millimeters) can hide imperfections while keeping the stacked look.
4. White Tiles with Built-In Niche Accent
Storage in showers often turns into a mess of bottles sitting on the floor or balancing on tiny ledges. A built-in niche solves that while also giving you a chance to add a bit of personality.
Using large white tiles around the niche keeps things clean, while the inside can feature a different texture or pattern. It’s practical and decorative at the same time.
Why This Works
The niche breaks up the flat surface without overwhelming it. It also creates a natural focal point right where your eye tends to land.
How to Do It
- Plan niche placement based on eye level and usability
- Line the niche interior with a contrasting tile
- Use waterproofing carefully around edges
- Keep niche edges clean and sharp
Style & Design Tips
Try subtle marble, mosaic, or textured tiles inside the niche. Avoid overly busy patterns that clash with the large white tiles.
Pro Tip or Budget Hack
Use leftover tiles or smaller samples for the niche interior to save money while still adding contrast.
5. Matte Finish White Tiles for a Soft Look
Glossy tiles reflect light well, but they can sometimes feel a bit too shiny or clinical. Matte large white tiles give a softer, more relaxed vibe that still looks polished.
I personally prefer matte in showers because it hides water spots better. You don’t end up wiping down the walls every single day just to keep them looking decent.
Why This Works
Matte surfaces diffuse light instead of reflecting it sharply, which creates a calmer atmosphere. They also reduce visible streaks and smudges.
How to Do It
- Choose high-quality matte porcelain tiles
- Pair with slightly darker grout for definition
- Test samples under your bathroom lighting
- Seal grout properly for longevity
Style & Design Tips
Combine matte tiles with natural materials like wood or stone for a balanced look. Avoid pairing with overly glossy fixtures unless you want contrast.
Pro Tip or Budget Hack
Look for matte tiles labeled “easy clean” or “low maintenance” to avoid extra upkeep later.
6. White Tiles with Marble Veining Effect
Plain white isn’t for everyone, and that’s fair. Large tiles with subtle marble veining give you the brightness of white with a bit more personality.
This is one of those options that feels slightly upscale without actually requiring real marble. I’ve used porcelain marble-look tiles before, and they hold up way better in everyday use.
Why This Works
The veining adds movement and texture while keeping the overall palette light. It also disguises minor imperfections or dirt.
How to Do It
- Choose large-format marble-look porcelain tiles
- Align veining patterns for a natural flow
- Use light grout to keep the look cohesive
- Plan layout carefully before installation
Style & Design Tips
Keep everything else simple so the veining can stand out. Too many competing elements can make the space feel chaotic.
Pro Tip or Budget Hack
Buy extra tiles and dry-lay them first to match veining patterns before installation. It makes a big difference.
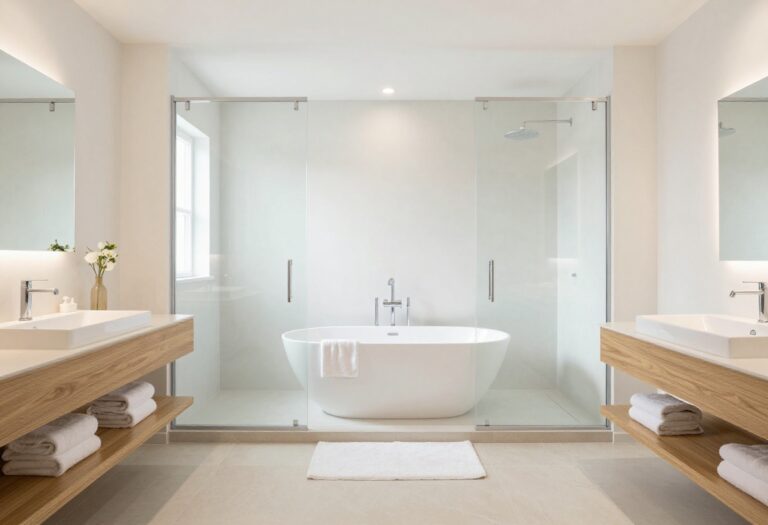
7. White Tiles Paired with Glass Shower Panels
Heavy shower enclosures can make a bathroom feel boxed in. Pairing large white tiles with clear glass panels keeps everything open and airy.
This combination works especially well in smaller bathrooms where every inch matters. It creates that clean, almost spa-like feel without much effort.
Why This Works
Glass allows light to pass through, while white tiles reflect it, making the space feel larger. Together, they eliminate visual barriers.
How to Do It
- Install frameless or minimal-frame glass panels
- Keep tile layout simple and clean
- Use proper sealing to prevent leaks
- Ensure correct slope for drainage
Style & Design Tips
Match hardware finishes with your fixtures for consistency. Avoid bulky frames that interrupt the open look.
Pro Tip or Budget Hack
If frameless glass is too expensive, go for semi-frameless options with thinner edges.
8. Large White Tiles with Textured Feature Wall
All-white doesn’t have to mean flat or boring. Adding a textured white tile feature wall brings depth without changing the color scheme.
I’ve seen this done with wave tiles or subtle 3D patterns, and it adds just enough interest without overwhelming the space. It’s a nice middle ground between plain and dramatic.
Why This Works
Texture creates shadows and highlights, which add dimension. It keeps the space visually engaging while staying cohesive.
How to Do It
- Choose one wall as the feature area
- Use textured tiles in the same white tone
- Keep other walls simple and smooth
- Install with precise alignment
Style & Design Tips
Use soft lighting to highlight the texture. Avoid placing textured tiles in areas that are hard to clean.
Pro Tip or Budget Hack
Use textured tiles only on a small section to reduce cost while still getting the effect.
9. White Tiles with Black Fixtures for Contrast
Sometimes all-white needs a bit of grounding to feel complete. Black fixtures create a strong contrast that sharpens the entire look.
This combo feels modern without trying too hard. I’ve noticed even simple showers look more put-together once you swap out chrome for black.
Why This Works
Contrast adds definition and visual interest. Black elements anchor the brightness of white tiles.
How to Do It
- Choose matte black showerheads and handles
- Keep tile design simple to highlight fixtures
- Coordinate with other bathroom hardware
- Maintain fixtures regularly to avoid buildup
Style & Design Tips
Balance is key, so don’t overdo the black elements. Too much can make the space feel heavy.
Pro Tip or Budget Hack
Start with smaller upgrades like handles or hooks before committing to full fixture replacements.
10. Minimalist White Tile Shower with Hidden Drain
Cluttered floors can ruin an otherwise clean design. A hidden or linear drain paired with large white tiles keeps everything streamlined.
This setup looks simple, but it requires a bit more planning. Once done right, though, it gives that clean, almost seamless finish that feels high-end.
Why This Works
Eliminating visible drain clutter enhances the minimalist look. It also improves water flow when installed correctly.
How to Do It
- Install a linear or concealed drain system
- Ensure proper slope toward the drain
- Use large tiles for fewer interruptions
- Work with an experienced installer
Style & Design Tips
Keep everything neutral and uncluttered to maintain the minimalist feel. Avoid adding unnecessary accessories.
Pro Tip or Budget Hack
If a hidden drain isn’t possible, choose a sleek stainless option that blends with the floor.
Final Thoughts
Large white tiles aren’t just a safe choice, they’re one of the easiest ways to make a bathroom feel cleaner, bigger, and more intentional. The difference really comes down to how you use them, not just the tiles themselves.
Pick one idea that fits your space and actually commit to it instead of mixing too many styles. I’ve learned the hard way that simpler usually ends up looking way better in the long run.