9 Small Bathroom With Walk-In Shower Ideas
Small bathrooms don’t get messy because you’re disorganized. They get messy because the layout forces you to fight for space every single day.
One towel rack in the wrong spot, a shower door that swings too far, or a vanity that eats up the walking path, and suddenly the room feels like a storage closet with plumbing.
And honestly, the walk-in shower can either save the whole bathroom or make it feel even tighter if you do it wrong.
The good news is there are a bunch of design moves that make a small bathroom feel bigger, cleaner, and way more expensive than it actually is.
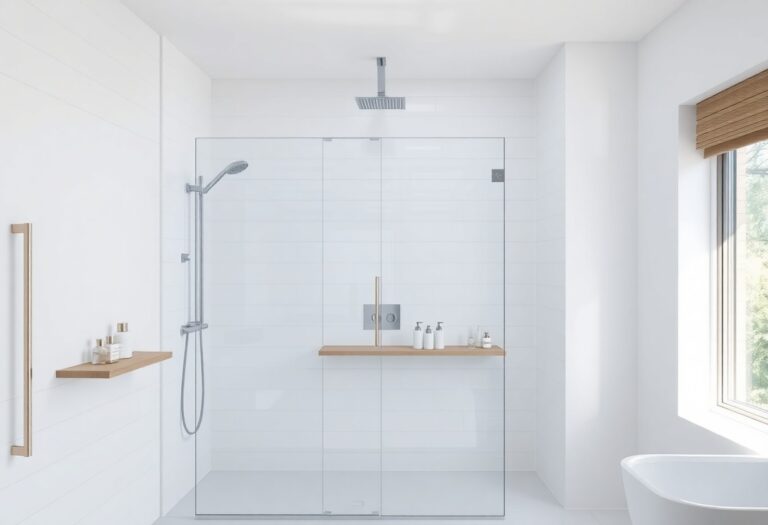
1. Go Doorless With a Single Glass Panel
Most small bathrooms feel cramped because the shower area gets boxed in like it’s a separate little room. The moment you add a swinging shower door, you’re basically stealing usable floor space from an already tiny bathroom.
A doorless walk-in shower with one fixed glass panel keeps everything open while still controlling splash.
I’ve seen this one make the biggest difference in small bathrooms because it instantly removes that “tight hallway” feeling.
It’s also one of those upgrades that looks expensive even if the materials are pretty basic. You just have to plan the layout so you don’t end up with water everywhere.
Why This Works
A single glass panel keeps the shower visually connected to the rest of the bathroom, which makes the room feel larger. Your eyes can travel through the whole space instead of stopping at a bulky door frame. It also makes cleaning easier because you don’t have tracks, hinges, or corners collecting grime.
The other win is functionality. You’re not squeezing around a door or worrying about it bumping into the toilet or vanity, which happens way more often than people admit.
How to Do It
- Measure your shower space and decide where the opening should be so water doesn’t spray straight out.
- Install a fixed glass panel that covers at least half of the shower opening.
- Use a sloped shower floor and a properly placed drain to keep water moving inward.
- Add a quality shower curtain alternative only if you need extra splash protection.
- Seal everything like your life depends on it, because leaks in a small bathroom are a nightmare.
Style & Design Tips
Use clear glass instead of frosted if you want the room to feel bigger. Frosted glass can look nice, but it breaks up the space visually and makes the shower feel like a separate zone. Keep the hardware minimal too, because chunky brackets can make it look busy.
Avoid tiny glass panels that look like an afterthought. If you’re going to do it, do it properly so it looks intentional and sleek.
Pro Tip or Budget Hack
If custom glass is out of budget, look for standard-size glass panels sold at big-box stores. They often come in clean modern designs and cost way less than custom work. Spend the extra money on proper waterproofing instead, because that’s the part you can’t fake.
2. Use Large-Format Tiles to Make the Shower Feel Bigger
Small tiles can be cute, but they also create a ton of grout lines. And grout lines are basically visual clutter, especially in a small bathroom. If you want your walk-in shower to feel larger and cleaner, large-format tiles are one of the easiest upgrades.
I used to think big tiles were only for fancy bathrooms, but they actually work better in small spaces. Less grout means less maintenance, and it gives that smooth, hotel-style look that makes everything feel more polished.
Why This Works
Large tiles create long uninterrupted lines, which tricks your brain into seeing the shower as bigger than it is. The fewer grout breaks you have, the more seamless the walls feel. It also reflects light better, which helps a small bathroom feel more open.
From a practical standpoint, fewer grout lines means less scrubbing. That alone makes this idea worth considering.
How to Do It
- Choose tiles that are at least 12×24 inches, or larger if your shower walls allow it.
- Pick a grout color close to the tile color for a more seamless look.
- Make sure your walls are properly leveled, because large tiles show uneven surfaces easily.
- Use a tile leveling system during installation to prevent lippage.
- Seal grout properly so it doesn’t stain over time.
Style & Design Tips
If you want a modern look, go for matte porcelain in a neutral tone like warm white, greige, or soft gray. Glossy tile can look clean but it shows water spots like crazy, especially in hard water areas. Also, don’t overdo bold patterns on large tiles unless the rest of the bathroom is simple.
Avoid tiny mosaic floors unless you really love them, because they add back that grout-heavy look. If you do use mosaics, keep them in a simple color.
Pro Tip or Budget Hack
You can use large-format tiles only on the shower walls and do something cheaper on the bathroom floor. That way the shower becomes the “luxury zone” without your budget going into full panic mode. It’s a smart place to splurge because the shower is what people notice first.
3. Add a Built-In Shower Niche Instead of a Caddy
A shower caddy is fine until it starts leaning, rusting, or turning into a cluttered mess of half-used bottles. In a small bathroom, you really don’t have room for hanging organizers or corner racks that stick out. A built-in niche keeps everything tucked into the wall and instantly makes the shower look cleaner.
I’m going to be honest, I didn’t care about shower niches until I installed one. Now I think every shower should have one because it’s such a simple upgrade that makes daily life easier.
Why This Works
A niche gives you storage without taking up physical space. Instead of bottles sitting on the floor or on a bulky rack, they sit inside the wall cavity. That keeps your shower floor clear, which makes the shower feel bigger and safer.
It also makes the shower look more high-end. A niche feels like a custom design feature, even if it’s pretty basic.
How to Do It
- Choose the niche placement where it’s easy to reach but not directly in the water stream.
- Frame the niche between wall studs, or use a pre-made niche insert.
- Waterproof the niche area thoroughly using a membrane system.
- Tile the niche interior carefully, making sure the bottom shelf slopes slightly forward.
- Finish with clean trim edges or bullnose tile for a polished look.
Style & Design Tips
If you want the niche to blend in, tile it with the same tile as the shower walls. If you want it to pop, use a contrasting tile like a darker shade or a subtle pattern. Keep it simple though, because busy niche tile can make the shower feel chaotic.
Also, don’t make the niche too small. People do that and then get annoyed when nothing fits, especially tall shampoo bottles.
Pro Tip or Budget Hack
If a recessed niche isn’t possible, create a “fake niche” using a slim floating shelf mounted into the tile. It’s not as sleek, but it still looks better than a metal caddy and gives you storage without cluttering the floor.
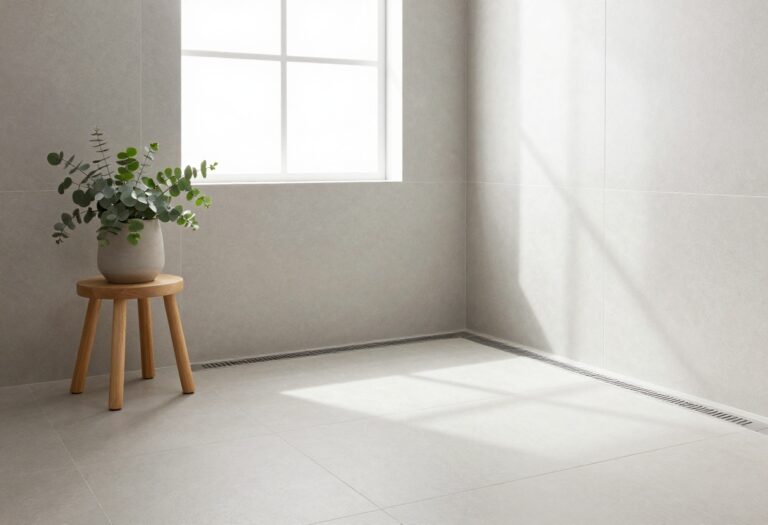
4. Install a Linear Drain for a Sleek, Modern Look
Traditional center drains work fine, but they can limit your shower design. A linear drain lets you slope the floor in one direction instead of multiple directions, which makes the shower floor look cleaner and more modern. In a small bathroom, that clean look matters because every little detail shows.
I’ll admit, linear drains aren’t always necessary, but when they’re done right, they make a shower feel like it belongs in a high-end renovation show.
Why This Works
A linear drain creates a more streamlined floor design. You can use larger floor tiles, which reduces grout lines and keeps things visually calm. It also improves water flow, especially in walk-in showers where you want water moving efficiently.
It’s also one of those subtle design details that screams “this bathroom was planned,” instead of “we just threw this together.”
How to Do It
- Choose the drain placement, either at the back wall or at the shower entrance.
- Install the drain during the plumbing rough-in stage.
- Slope the shower floor toward the drain in one consistent direction.
- Use large-format floor tile or a single slab look for a sleek finish.
- Test water flow before final sealing and grouting.
Style & Design Tips
Pick a drain cover that matches your shower fixtures, like brushed nickel, matte black, or brass. A mismatched drain can look weirdly cheap. You can also get tile-in drain covers that blend into the floor, which looks super clean.
Avoid overly decorative drain covers because they can look dated fast. Keep it simple and modern.
Pro Tip or Budget Hack
If you love the linear drain look but don’t want the cost, use a standard drain and still install larger shower floor tiles with matching grout. You won’t get the same slope simplicity, but you can still get a cleaner look without spending extra on specialized plumbing.
5. Use a Half-Wall Shower Divider for Privacy Without Closing the Space
Some people love full glass showers, but not everyone wants to feel like they’re showering in a display case. A half-wall divider gives you a little privacy and also creates a strong layout feature without closing off the room.
I like this option in small bathrooms because it adds structure. It makes the shower feel intentional and built-in, not like a random corner that got wet.
Why This Works
Half walls break up the space without blocking light or making the room feel smaller. They also create a natural spot for a shower glass panel if you want the best of both worlds. You get privacy plus an open, airy feel.
They can also act as extra storage space if you design them right.
How to Do It
- Build a half wall using moisture-resistant framing and cement board.
- Waterproof the entire wall thoroughly, especially the top ledge.
- Tile the wall to match or complement the shower design.
- Add a glass panel on top if you want splash control.
- Cap the wall with stone or solid surface material for durability.
Style & Design Tips
The top ledge should look intentional, not like an unfinished shelf. Use quartz, marble, or a solid slab tile for the cap so it feels clean and finished. Keep the half wall height balanced, usually around chest height, so it doesn’t feel awkwardly short.
Don’t make the wall too thick unless you need it for plumbing. A chunky half wall can eat up valuable space.
Pro Tip or Budget Hack
If you can’t afford stone for the wall cap, use a large porcelain tile as a single-piece top. It’s cheaper and still looks polished. Just make sure it’s installed with a slight slope so water doesn’t sit on it forever.
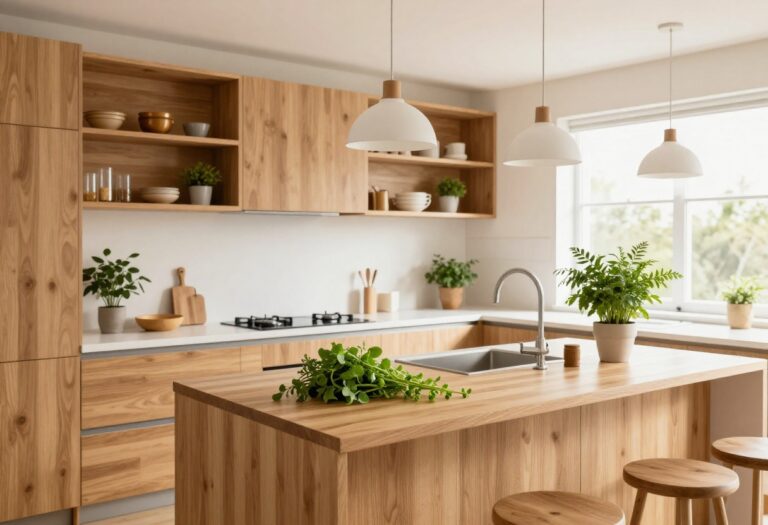
6. Choose a Floating Vanity to Free Up Visual Space
A bulky vanity in a small bathroom can make the whole room feel heavy. If you want your walk-in shower to feel more spacious, pairing it with a floating vanity is a smart move. It keeps the floor visible, which tricks the eye into seeing more space.
I used to think floating vanities were just trendy, but they’re honestly one of the best upgrades for small bathrooms. They make the room feel less cramped immediately.
Why This Works
A floating vanity creates visual breathing room. You can see the floor underneath, so the bathroom feels more open. It also makes cleaning easier because you’re not trying to mop around awkward cabinet edges.
It works especially well with walk-in showers because the whole room feels modern and airy instead of chopped up.
How to Do It
- Measure your bathroom and pick a vanity depth that doesn’t block walkways.
- Install blocking in the wall studs to support the vanity weight.
- Mount the vanity securely using heavy-duty hardware.
- Add a wall-mounted faucet if you want extra counter space.
- Finish with a simple mirror and lighting to keep things balanced.
Style & Design Tips
Pick a vanity with clean lines and minimal hardware. Shaker-style cabinets work, but they can feel busy in a tiny space. If you want warmth, go with natural wood tones. If you want a crisp look, go with white or soft gray.
Avoid vanities with lots of decorative trim. In small bathrooms, that detail can start to feel cluttered fast.
Pro Tip or Budget Hack
If you want the floating look but can’t afford a real floating vanity, use a standard vanity and add a recessed toe-kick shadow line. It’s not identical, but it creates a similar visual lift without the full remodel cost.
7. Use the Same Tile in the Shower and Bathroom Floor
If you want your small bathroom to look bigger without knocking down walls, this is one of the best tricks. Using the same tile on the shower floor (or shower walls) and the main bathroom floor creates continuity. It makes the room feel like one larger space instead of separate little zones.
I’ve seen tiny bathrooms look twice as big just by doing this one thing. It’s almost annoying how well it works.
Why This Works
When you break up a small bathroom with different tiles, your eyes stop at each transition. That makes the space feel chopped up. Matching tile keeps the visual flow smooth, which makes the bathroom feel bigger.
It also makes the walk-in shower feel like it belongs in the room instead of looking like an add-on.
How to Do It
- Choose a tile that works in both wet and dry areas.
- Use slip-resistant tile for the shower floor if possible.
- Keep grout lines aligned across the floor and shower entry.
- Use the same grout color throughout for consistency.
- Seal everything properly to prevent moisture issues.
Style & Design Tips
Neutral tiles work best here because they don’t overwhelm the space. If you want personality, add it through towels, hardware, or a statement mirror. Also, avoid super glossy tile on the floor unless you enjoy slipping like a cartoon character.
If you use patterned tile, keep it subtle. Busy patterns in small bathrooms can get exhausting fast.
Pro Tip or Budget Hack
If matching tile everywhere feels too expensive, match the color family instead. For example, use a similar warm gray tile in both areas, even if the sizes differ. You’ll still get that cohesive feel without paying for one premium tile across the whole bathroom.
8. Add Recessed Shelving Outside the Shower for Extra Storage
Small bathrooms always struggle with storage, especially when the shower takes up a big chunk of the wall space. One of the smartest ideas is adding recessed shelving outside the shower area, usually near the vanity or toilet. It keeps toiletries, towels, and décor items organized without adding bulky cabinets.
This is one of those ideas that looks custom and fancy, but it’s actually pretty practical. It’s also a lifesaver if your bathroom has zero linen closet space.
Why This Works
Recessed shelves use wall depth that normally goes to waste. Instead of adding furniture or shelves that stick out, you get storage built into the wall. That keeps walkways open and prevents the bathroom from feeling crowded.
It also creates an opportunity to style the space, which makes the bathroom feel more intentional.
How to Do It
- Identify a wall cavity that doesn’t contain plumbing or electrical lines.
- Cut out the drywall and frame the recessed opening.
- Add moisture-resistant backing and waterproofing if needed.
- Install shelving, either wood sealed properly or tiled shelves.
- Paint or tile the interior to match the bathroom design.
Style & Design Tips
Keep the shelves neat because clutter ruins the whole effect. Use matching containers or baskets to hold smaller items, and don’t overload the shelves with random bottles. A little styling goes a long way here, like one candle, one plant, and a stack of folded towels.
Avoid deep shelves that turn into dumping grounds. Shallow shelves look cleaner and force you to stay organized.
Pro Tip or Budget Hack
If recessed shelving isn’t possible, use a narrow wall-mounted cabinet with a mirrored front. It gives you storage and doubles as a mirror, which is basically a two-for-one deal in a small bathroom.
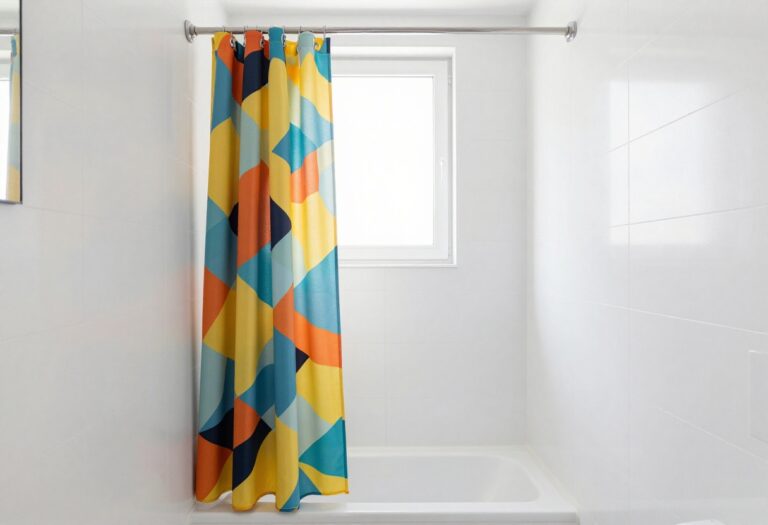
9. Swap the Shower Curtain Look for a Curbless Walk-In Shower
If you really want your small bathroom to feel bigger, a curbless walk-in shower is the ultimate upgrade. Removing the shower curb creates a smooth transition from bathroom floor to shower floor. It looks modern, feels open, and makes the whole bathroom feel less boxed in.
I won’t lie, this one takes more planning than the other ideas. But if you can pull it off, it makes a small bathroom feel like a high-end spa instead of a cramped rental.
Why This Works
Curbs create visual breaks. They also make the shower feel like a separate compartment. When you remove the curb, the entire bathroom feels like one continuous space, which is a huge win in a small layout.
It’s also more accessible. You don’t have to step over anything, which is great for kids, older adults, or honestly anyone who’s half asleep in the morning.
How to Do It
- Confirm your floor structure can handle a recessed shower pan.
- Install proper waterproofing across the entire shower zone.
- Slope the shower floor toward the drain carefully.
- Add a linear drain or center drain depending on the layout.
- Use a glass panel or half wall to control splash.
Style & Design Tips
This looks best when you keep the tile consistent across the floor. Use minimal grout lines and a drain cover that blends with the design. Also, don’t skip the splash control planning, because a curbless shower done wrong turns your bathroom into a wet mess.
Avoid putting the shower head too close to the opening. That’s a rookie mistake that leads to constant puddles.
Pro Tip or Budget Hack
If a true curbless shower is too expensive, you can do a low-profile curb instead. It still gives you a more modern look and easier access than a tall curb, and it usually costs less because you don’t need to modify the floor as much.
Final Thoughts
A small bathroom with a walk-in shower can feel insanely functional if you design it like you actually live there. The goal isn’t to cram in trendy features, it’s to remove the stuff that makes the room feel tight and annoying. Once you fix the layout flow, everything else starts to look better automatically.
If I had to pick just one upgrade, I’d go with the glass panel and built-in niche combo. It’s simple, it looks clean, and it makes your bathroom feel like you paid way more than you did.