11 Open Walk-In Shower Ideas With an Airy, No-Door Look
Open showers remove physical barriers, which immediately changes how a bathroom feels and functions. Water control, layout, and material choice matter way more here than in a traditional enclosed setup. When done right, everything looks cleaner, bigger, and easier to maintain.
I’ve tried a couple of these ideas myself, and honestly, some worked way better than expected while others needed tweaking. The difference usually came down to planning details like drainage and splash zones. So let’s go through ideas that actually make sense in real homes, not just Pinterest fantasy bathrooms.
1. Half Glass Partition for Splash Control
Water tends to travel farther than expected in open layouts, especially if the showerhead pressure is strong. A full enclosure defeats the purpose, but no barrier at all can quickly turn your bathroom into a mini water park. A half glass panel strikes that balance without closing things off.
I’ve seen this work really well in medium-sized bathrooms where you want openness but still need control. It feels intentional instead of unfinished, which is a mistake people often make with open showers.
Why This Works
The half partition blocks direct spray while keeping sightlines open across the room. It visually separates the wet zone without making the shower feel boxed in.
It also allows better airflow, which helps everything dry faster and reduces that damp, musty feeling.
How to Do It
- Install a fixed glass panel covering about half the shower length
- Position the showerhead away from the open side
- Keep the panel height around chest to shoulder level
- Seal edges properly to prevent leaks
Each step matters because placement and height directly affect how much water escapes.
Style & Design Tips
Use frameless glass for a cleaner look that blends into the space. Avoid bulky frames because they instantly make the shower feel smaller.
Stick with clear glass instead of frosted, unless privacy is an issue, since clarity enhances that open effect.
Pro Tip or Budget Hack
If custom glass feels expensive, look for standard panel sizes before ordering custom cuts. You’ll save more than you think just by working around available dimensions.
2. Curbless Entry for Seamless Flow
Stepping over a shower curb feels small until you remove it, and then you notice the difference immediately. A curbless design makes the entire bathroom feel like one continuous space.
I tried this in a small bathroom renovation, and it honestly made the room feel almost double in size. It’s one of those changes that looks subtle but feels huge in daily use.
Why This Works
Without a curb, your eye doesn’t hit any visual stops, so the space appears larger. It also improves accessibility, which is a bonus you don’t realize you need until later.
The key here is proper floor slope, because water needs direction without barriers.
How to Do It
- Slope the shower floor slightly toward the drain
- Use large-format tiles for fewer visual breaks
- Install a linear drain for better water flow
- Waterproof the entire shower area thoroughly
Skipping any of these can lead to pooling or leaks, which ruins the whole concept.
Style & Design Tips
Go for matching floor tiles across the entire bathroom to enhance continuity. Avoid switching materials mid-floor unless you want to visually separate zones.
Keep grout lines minimal for a smoother, uninterrupted look.
Pro Tip or Budget Hack
Linear drains look high-end but come in budget versions now. Just avoid the ultra-cheap ones because poor drainage will cost you more later.
3. Statement Tile Accent Wall
Open showers can sometimes feel too plain if everything blends together. A bold tile wall gives the space a focal point without adding clutter.
I’ve personally messed this up once by choosing something too busy, and it ended up overwhelming the space. So yeah, there’s definitely a sweet spot here.
Why This Works
A feature wall draws attention and defines the shower area without physical barriers. It adds personality while still keeping the layout open.
It also helps anchor the design so the space doesn’t feel incomplete.
How to Do It
- Choose one wall behind the showerhead as the accent
- Use tiles with texture, pattern, or contrast
- Keep surrounding walls simple to balance it out
- Align tile patterns carefully for a clean finish
Placement matters because the wrong wall won’t create the same visual impact.
Style & Design Tips
Stick with one bold element only, not multiple competing patterns. Too much going on will make the space feel chaotic.
Neutral bathrooms work great with a single standout texture like stone or geometric tile.
Pro Tip or Budget Hack
Use tile look panels or smaller tile sections to cut costs instead of covering the entire wall with expensive materials.
4. Recessed Shower Niche Storage
Open showers don’t leave much room for bulky shelves or hanging organizers. Built-in niches solve that problem without breaking the clean look.
I always recommend this because once you go niche, you won’t go back to those plastic corner shelves again.
Why This Works
A recessed niche keeps products within reach while staying flush with the wall. It maintains that streamlined, uncluttered appearance.
It also prevents items from sticking out into the shower space, which helps with movement and safety.
How to Do It
- Plan niche placement during wall construction
- Position it at chest or waist height for easy access
- Waterproof the niche carefully
- Use tile inside the niche for durability
Planning ahead is key because adding it later is way more complicated.
Style & Design Tips
Use a contrasting tile inside the niche to subtly highlight it. Keep the outer wall consistent to maintain flow.
Avoid oversized niches that become visual distractions.
Pro Tip or Budget Hack
Instead of multiple niches, create one long horizontal niche. It looks modern and often costs less in materials and labor.
5. Floor-to-Ceiling Tile for a Continuous Look
Stopping tile halfway up the wall can make open showers feel unfinished. Extending tile all the way up creates a cohesive and intentional design.
I didn’t realize how much this mattered until I saw both versions side by side. The full-height tile just looks more polished.
Why This Works
Continuous tiling eliminates visual breaks, making the shower feel taller and more integrated. It also protects walls from moisture more effectively.
The result feels cleaner and more complete overall.
How to Do It
- Tile from floor to ceiling in the shower area
- Use consistent grout color for uniformity
- Ensure proper waterproof backing
- Align tiles carefully at corners
Precision matters here because misalignment becomes very noticeable.
Style & Design Tips
Choose light or neutral tones to keep the space airy. Dark tiles can work, but they require good lighting to avoid feeling closed in.
Large tiles reduce grout lines and enhance the seamless effect.
Pro Tip or Budget Hack
Use premium tiles only in visible areas and cheaper tiles on less noticeable walls to save money without sacrificing style.
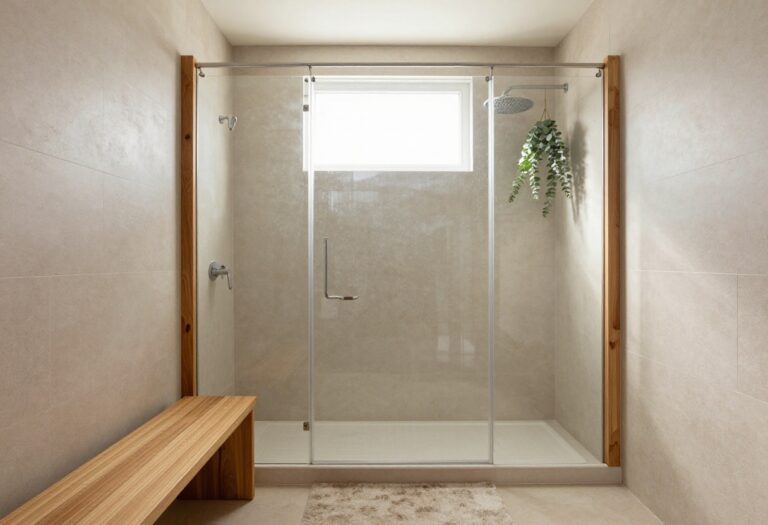
6. Open Shower with a Skylight Above
Natural light instantly changes how an open shower feels, especially when it comes from above. A skylight brings brightness without relying on artificial lighting.
I’ve seen this once in a compact bathroom, and it honestly made the whole space feel like a mini spa.
Why This Works
Light from above spreads evenly across the shower, reducing shadows and making everything look cleaner. It enhances the open concept by eliminating dark corners.
It also helps the space feel more connected to the outdoors.
How to Do It
- Install a skylight directly above the shower zone
- Use moisture-resistant framing materials
- Ensure proper sealing to prevent leaks
- Pair with neutral tiles to reflect light
Proper installation is crucial because leaks can be a nightmare.
Style & Design Tips
Keep the surrounding design simple so the skylight becomes the main feature. Avoid heavy textures that absorb light.
Use reflective surfaces to amplify brightness.
Pro Tip or Budget Hack
If a skylight isn’t possible, use a high-positioned window to mimic the same effect.
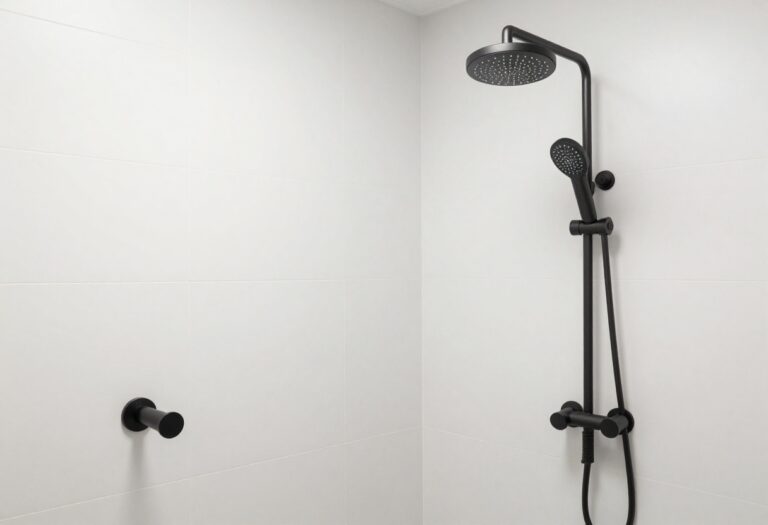
7. Minimalist Black Fixtures for Contrast
Open showers can sometimes feel too soft or washed out. Black fixtures add contrast and structure without cluttering the space.
I used matte black once, and it completely changed the vibe of the bathroom in the best way.
Why This Works
Dark fixtures create visual anchors in an otherwise open design. They define elements like the showerhead and controls.
This contrast makes the layout feel more intentional.
How to Do It
- Choose matte black showerheads and handles
- Match fixtures across the bathroom for consistency
- Keep surrounding colors light for contrast
- Maintain finishes to prevent water spots
Consistency matters because mismatched finishes look messy fast.
Style & Design Tips
Avoid mixing too many finishes. Stick to one dominant finish for a cohesive look.
Matte finishes hide fingerprints better than glossy ones.
Pro Tip or Budget Hack
Look for black finish overlays instead of replacing entire fixtures to save on costs.
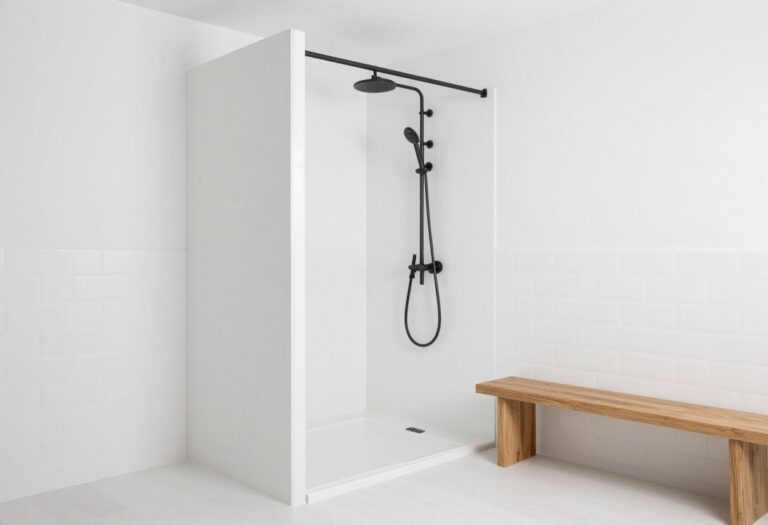
8. Walk-In Shower with Bench Seating
Standing showers are fine until you actually want to relax. Adding a built-in bench makes the space more functional and comfortable.
I didn’t think I’d use it much, but it turns out it’s surprisingly useful for everything from shaving to just sitting under warm water.
Why This Works
A bench adds usability without cluttering the space. It turns the shower into a more versatile area.
It also enhances the spa-like feel without major changes.
How to Do It
- Build a waterproof bench into one wall
- Keep the height comfortable for sitting
- Tile it to match the shower
- Ensure proper slope for water runoff
Water drainage is important to prevent pooling on the bench.
Style & Design Tips
Use contrasting tile or stone for the bench to make it stand out subtly. Avoid bulky designs that take up too much space.
Keep edges clean and simple.
Pro Tip or Budget Hack
If built-in benches are too costly, consider a teak shower stool for a similar effect at a lower price.
9. Large Format Tiles for Fewer Lines
Busy grout lines can make open showers feel cluttered. Large tiles simplify the look and make cleaning easier.
I switched to bigger tiles once, and honestly, cleaning became way less annoying.
Why This Works
Fewer grout lines mean fewer visual interruptions. This enhances the open and airy feel of the shower.
It also reduces maintenance since grout is usually the hardest part to clean.
How to Do It
- Choose tiles larger than 12×24 inches
- Use minimal grout spacing
- Align tiles carefully for consistency
- Seal grout properly
Proper installation ensures durability and a polished finish.
Style & Design Tips
Stick with subtle textures or patterns to avoid overwhelming the space. Keep the palette simple for a clean look.
Consistency is key for maintaining that seamless feel.
Pro Tip or Budget Hack
Look for clearance or discontinued large tiles to get premium looks at lower prices.
10. Open Shower with a Partial Wall Divider
A partial wall gives more structure than glass while still keeping things open. It works well if you want a bit more privacy without full enclosure.
I’ve seen this used in family homes where multiple people use the same bathroom. It’s a practical compromise.
Why This Works
The wall blocks direct spray and adds a sense of separation. It also provides a surface for fixtures or storage.
At the same time, it keeps the top and sides open for airflow.
How to Do It
- Build a half-height wall near the shower entry
- Waterproof it thoroughly
- Tile it to match the shower
- Position fixtures strategically
Placement determines how effective it is at controlling water.
Style & Design Tips
Keep the wall simple and avoid overdecorating it. Clean lines work best for open designs.
Use matching materials for a cohesive look.
Pro Tip or Budget Hack
Instead of full masonry, use waterproof panels for quicker and cheaper installation.
11. Open Shower with Linear Drain Design
Traditional center drains can limit how water flows in open showers. Linear drains offer better control and a cleaner look.
I didn’t care about drains at first, but after dealing with uneven water flow once, I definitely changed my mind.
Why This Works
Linear drains allow water to flow in one direction, which works perfectly for curbless designs. They also look more modern and less intrusive.
This setup improves both function and appearance.
How to Do It
- Install the drain along one wall or edge
- Slope the floor toward the drain
- Ensure proper waterproofing
- Use compatible tile sizes
Correct slope is crucial for preventing water pooling.
Style & Design Tips
Choose a low-profile drain cover that blends with the floor. Avoid overly decorative designs that stand out too much.
Keep everything aligned for a clean finish.
Pro Tip or Budget Hack
Look for tile-in drain covers that allow you to place tile over the drain, making it almost invisible.
Final Thoughts
Open walk-in showers look simple, but the small details decide whether they feel luxurious or frustrating. Planning layout, drainage, and materials properly makes everything easier in the long run.
I’d personally start with one or two of these ideas instead of trying to combine everything at once. Once you get the basics right, the rest comes together naturally.