8 Bathroom Divider Ideas That Define Space
Most bathrooms struggle with one basic design problem: everything sits in the same open area even though the room actually performs several different functions.
A shower, vanity, toilet, and storage all share the same footprint, which often makes the space feel messy or awkward.
A simple divider can quietly solve that issue without making the bathroom feel smaller. The trick is choosing the right kind of separation so the room still flows naturally.
Some dividers create visual structure, while others add storage or style along the way. A good one feels intentional, not like a wall randomly dropped into the middle of the room.
1. Half Wall Divider
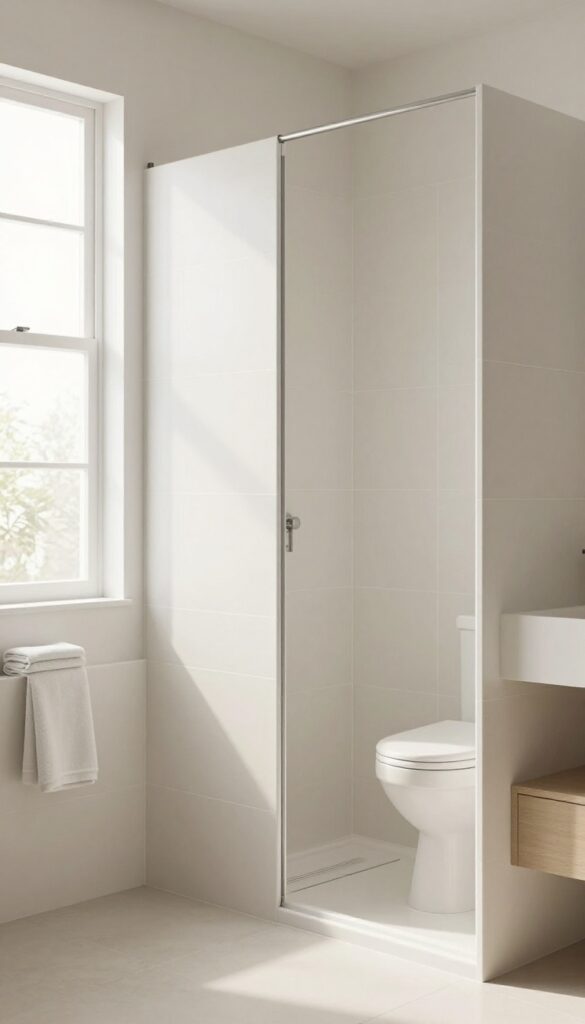
A half wall divider solves one of the most common bathroom layout problems: the toilet or shower sitting fully exposed in the middle of the room. Full walls make small bathrooms feel boxed in, but leaving everything open rarely feels comfortable either. A half wall strikes a really nice balance between privacy and openness.
I’ve seen this used in several modern bathrooms, and honestly it’s one of those upgrades that instantly makes the room feel more designed. Instead of awkwardly staring at the toilet from the doorway, the space suddenly feels organized and intentional.
Why This Works
A half wall defines zones without blocking light or making the room feel smaller. The eye still travels across the room, which keeps the bathroom feeling open and breathable.
It also gives the room visual structure. Bathrooms without defined zones often feel chaotic because every fixture competes for attention.
How to Do It
- Decide which area needs separation most (usually the toilet or shower).
- Build a wall about 42–48 inches high.
- Use moisture-resistant drywall or cement board.
- Finish the top with tile, stone, or a slab surface.
- Align the divider with existing fixtures to maintain symmetry.
Style & Design Tips
Use the top surface intentionally. A small ledge can hold decor, candles, or folded towels.
Tile the divider with the same tile used in the shower to make the design feel cohesive. Avoid painting it a random accent color unless the room has a clear theme.
Pro Tip or Budget Hack
Instead of building a thick wall, frame a narrow divider only 4–6 inches wide. It saves floor space and still provides the same visual separation.
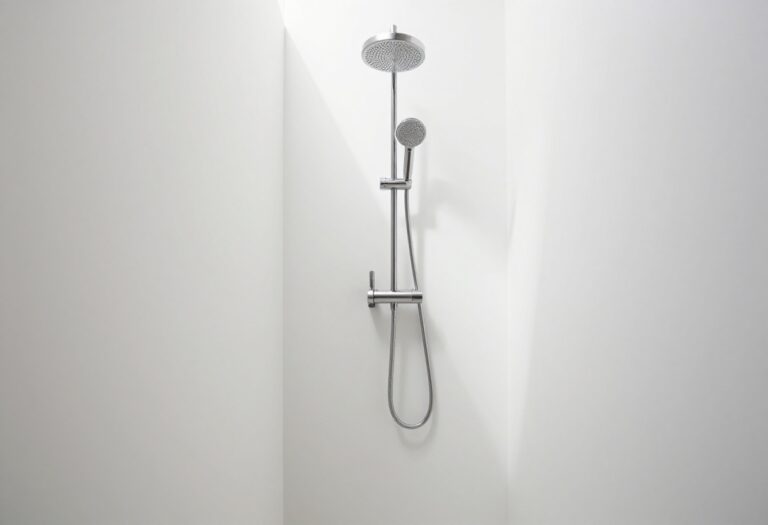
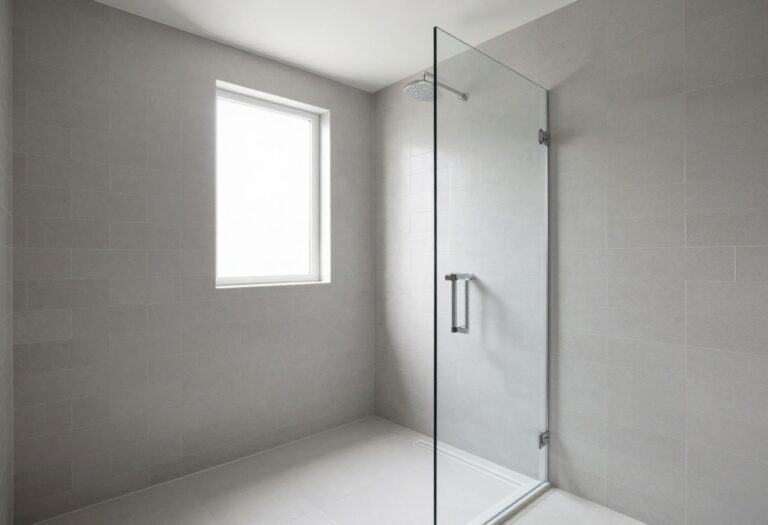
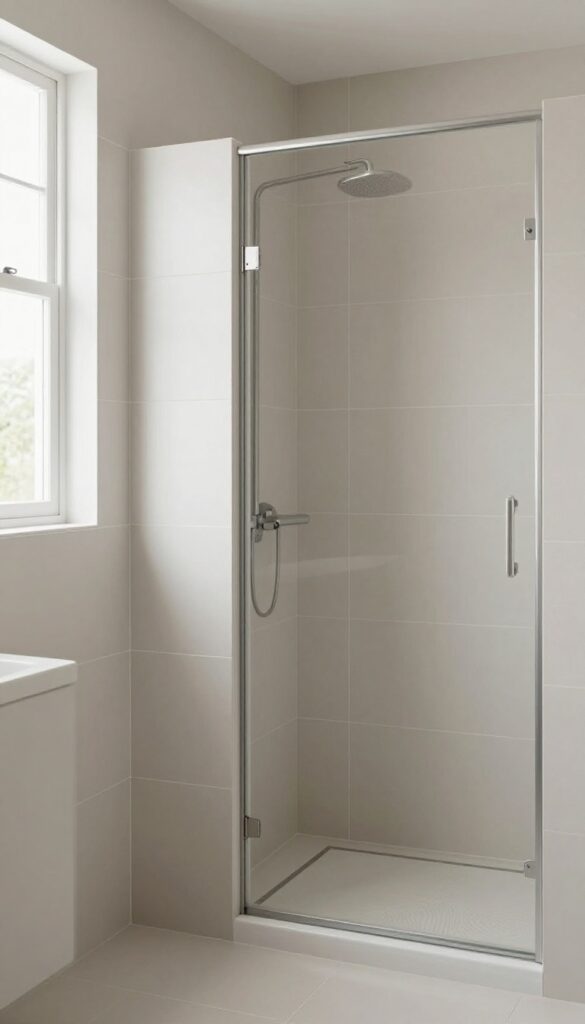
2. Glass Panel Divider
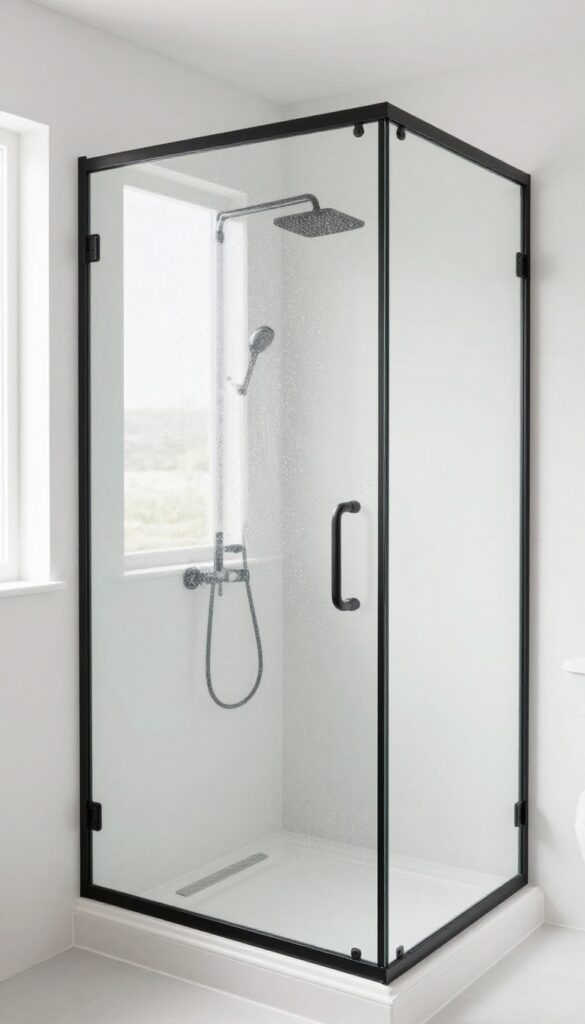
Open bathrooms look beautiful in photos, but in real life they sometimes feel a bit… exposed. A fixed glass panel solves that without turning the space into a maze of walls.
This divider works especially well between the shower and the rest of the bathroom. It blocks water splash while keeping the room bright and airy.
Why This Works
Glass maintains sightlines across the room. When you avoid visual barriers, the bathroom automatically feels larger.
It also lets natural light move freely. Even a small window can illuminate the entire space when glass dividers are used instead of solid walls.
How to Do It
- Measure the area where the divider will sit.
- Choose tempered safety glass panels.
- Install floor and wall mounting brackets.
- Seal edges with waterproof silicone.
- Leave a small opening for easy entry.
Style & Design Tips
Black metal frames add a modern edge, while frameless glass keeps things minimal and spa-like.
If privacy matters, choose frosted or fluted glass instead of clear panels.
Pro Tip or Budget Hack
Look for pre-made shower glass panels rather than custom pieces. They cost dramatically less and often look just as good.
3. Slatted Wood Divider
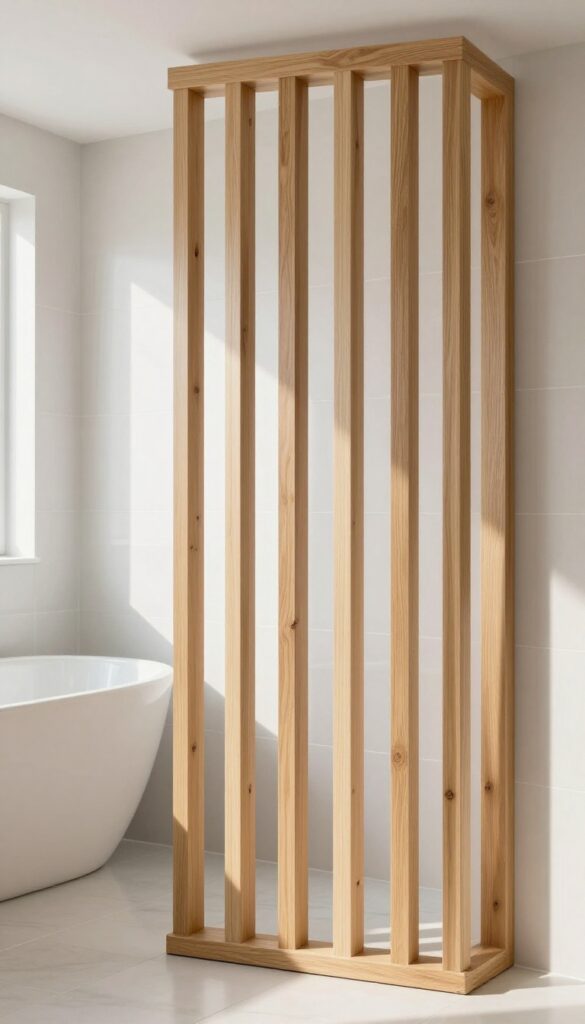
Bathrooms sometimes feel cold because tile, porcelain, and glass dominate the room. Adding wood instantly warms things up.
A vertical slatted wood divider introduces texture while still allowing light and airflow to move through the space.
Why This Works
The spacing between slats provides visual separation without completely blocking the view. It feels softer and more relaxed than a solid wall.
Wood also balances the hard surfaces found in most bathrooms.
How to Do It
- Install a narrow frame from floor to ceiling.
- Attach evenly spaced vertical wood slats.
- Seal the wood with waterproof finish.
- Anchor the divider securely to floor and ceiling.
- Keep spacing consistent for a clean look.
Style & Design Tips
Choose light oak or teak tones for a spa-inspired design.
Avoid overly dark wood in small bathrooms because it can make the divider feel heavy.
Pro Tip or Budget Hack
Instead of expensive hardwood, use pine slats and apply a wood stain. Once sealed, it looks surprisingly high-end.
4. Built-In Shelf Divider
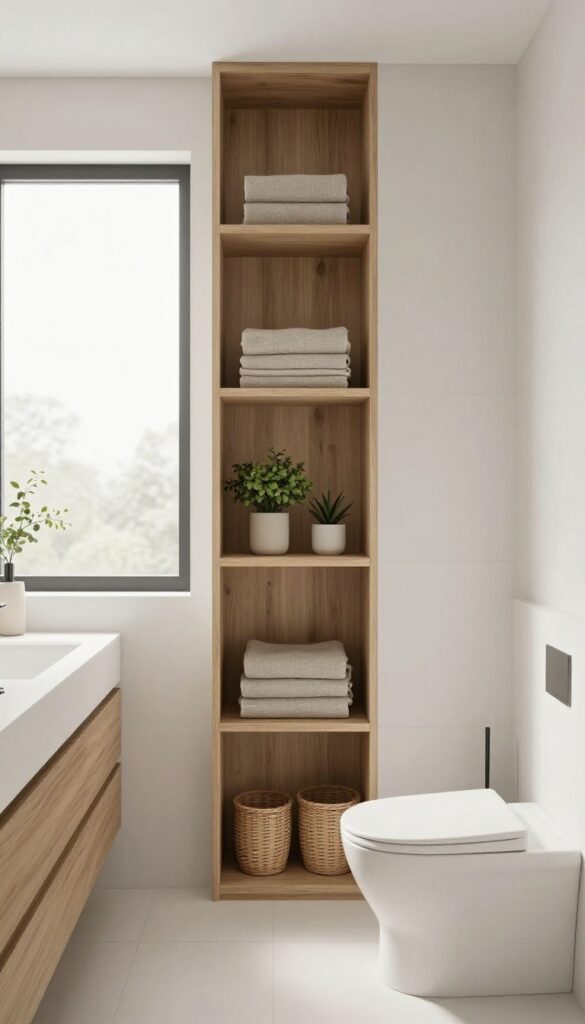
Storage always feels limited in bathrooms, especially in smaller homes. A shelf divider solves two problems at once: it separates areas while adding practical storage.
Think of it as a vertical shelving unit placed between the vanity and toilet or between the tub and sink.
Why This Works
Open shelves maintain visual openness while still defining space. The items placed on the shelves also add personality to the room.
It turns an otherwise wasted divider into a functional feature.
How to Do It
- Build a narrow shelving frame from floor to ceiling.
- Anchor it securely to wall studs.
- Use moisture-resistant wood or laminate.
- Add evenly spaced shelves.
- Style with towels, baskets, or plants.
Style & Design Tips
Keep the shelves lightly styled. Overcrowding them makes the divider look messy.
Use matching storage baskets to maintain a clean look.
Pro Tip or Budget Hack
Repurpose a tall open bookshelf instead of building a custom divider. Anchor it to the wall for stability.
5. Sliding Barn Door Divider
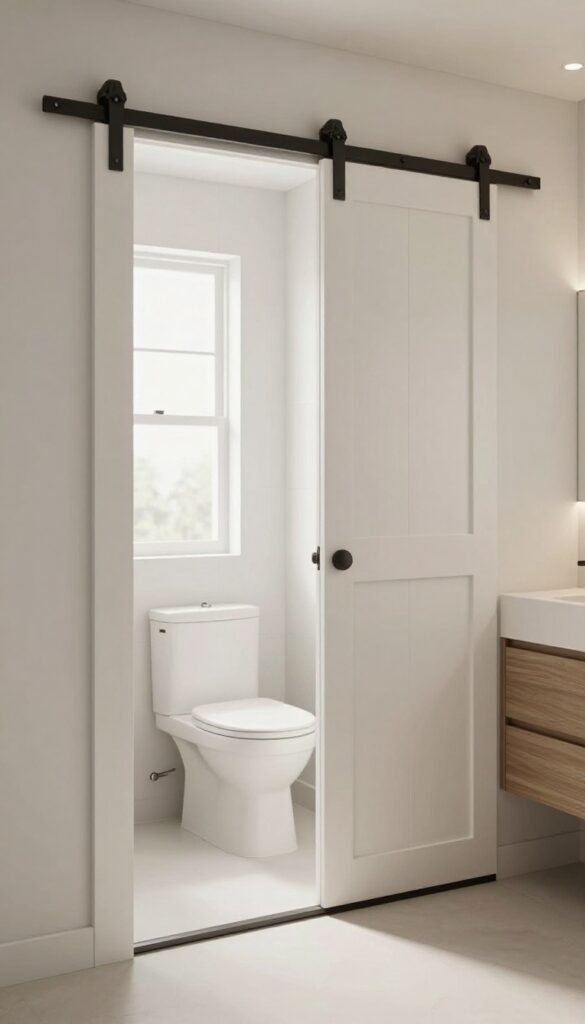
Some bathrooms don’t have enough space for traditional doors or walls. A sliding barn door divider solves that layout challenge in a surprisingly stylish way.
It works well for separating the toilet area or hiding a laundry closet inside the bathroom.
Why This Works
Sliding doors require zero swing space. That alone makes them perfect for compact bathrooms.
They also add character. A simple wood door can instantly become a focal point.
How to Do It
- Install a barn door track above the opening.
- Mount the door onto the sliding hardware.
- Attach floor guides to keep it aligned.
- Seal the wood for moisture resistance.
- Test the sliding motion for smooth operation.
Style & Design Tips
Paint the door the same color as the vanity for a cohesive look.
Avoid overly rustic designs unless the entire bathroom follows that style.
Pro Tip or Budget Hack
Use a hollow-core interior door instead of a heavy solid wood slab. It slides easier and costs far less.
6. Tile Partition Wall
Sometimes the bathroom simply needs stronger separation between wet and dry zones. A tiled partition wall does exactly that while blending into the overall design.
This divider works particularly well between a walk-in shower and the rest of the bathroom.
Why This Works
Tile partitions handle moisture extremely well. That makes them durable in high-humidity environments.
They also visually connect with the rest of the bathroom when the same tile continues across surfaces.
How to Do It
- Frame the partition using moisture-resistant materials.
- Install cement backer board.
- Apply waterproof membrane.
- Lay tile evenly across the surface.
- Seal grout lines carefully.
Style & Design Tips
Extend the same tile from the shower onto the divider for a seamless look.
Avoid mixing too many tile patterns or the divider may look out of place.
Pro Tip or Budget Hack
Use large-format tiles. Fewer grout lines create a cleaner appearance and make installation easier.
7. Curtain Divider
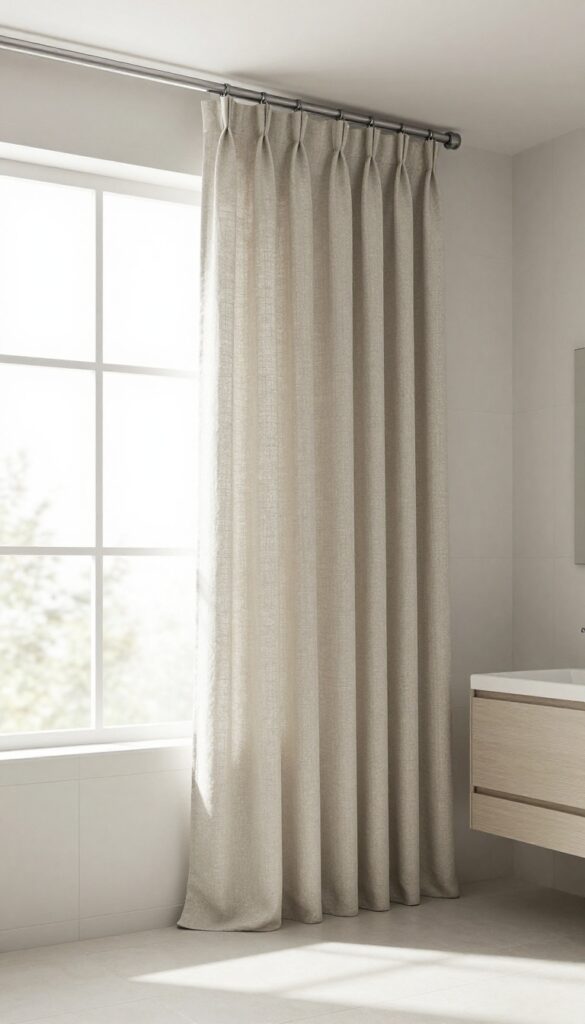
Not every bathroom upgrade needs to involve construction tools or contractors. A curtain divider offers the simplest possible solution.
It works especially well in rental spaces where permanent modifications aren’t allowed.
Why This Works
Curtains provide instant privacy and flexibility. You can open or close them depending on the situation.
They also soften the bathroom visually, which balances the room’s hard surfaces.
How to Do It
- Install a ceiling-mounted curtain track.
- Choose a waterproof or washable curtain.
- Hang the curtain using sliding hooks.
- Adjust the length so it barely touches the floor.
- Test the curtain movement for smooth opening.
Style & Design Tips
Use linen-look or textured fabric for a more upscale appearance.
Avoid cheap plastic shower curtains because they instantly downgrade the room’s style.
Pro Tip or Budget Hack
IKEA curtain tracks work incredibly well for this setup and cost very little.
8. Metal Frame Partition
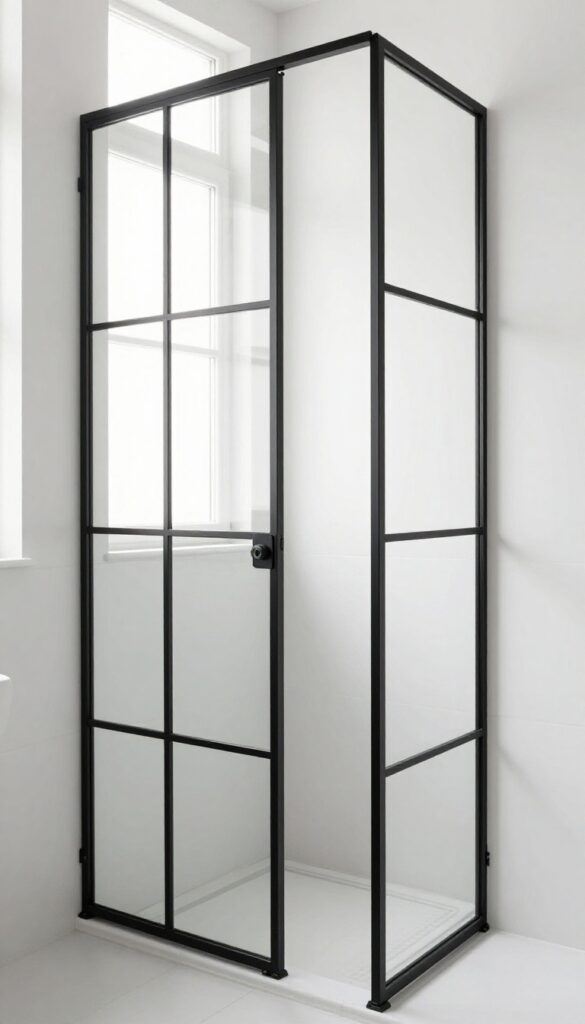
Some bathrooms benefit from a bold architectural feature. A metal frame divider delivers that without fully enclosing the space.
This style often uses thin steel frames with glass panels inside.
Why This Works
The grid structure creates strong visual structure while keeping the bathroom open.
It also adds a modern industrial touch that pairs well with contemporary bathrooms.
How to Do It
- Install a metal frame anchored to the floor and wall.
- Add tempered glass panels inside the grid.
- Seal joints with waterproof fittings.
- Align the divider with the shower or vanity area.
- Keep spacing symmetrical for balance.
Style & Design Tips
Matte black frames work best because they contrast nicely against tile and white fixtures.
Avoid overly thick frames, which can make the divider feel heavy.
Pro Tip or Budget Hack
Instead of custom metalwork, buy ready-made steel room divider panels and modify them for bathroom use.
Final Thoughts
Bathrooms function better when the layout clearly separates different activities. Dividers don’t just add privacy; they guide movement and make the room feel organized.
The best part is that many of these ideas work in both large and small bathrooms. A thoughtful divider often transforms the entire space without requiring a full renovation.